
In this article, you’ll learn how to:
The Importance of Sources
Adding sources to your course improves your credibility and lets your audience know you’ve done your research. With easy access to information, including false information, it is important to give your audience the confidence that you are presenting trustworthy information. Users can view the sources linked to a published Lifeology course in a popup window by clicking the sources icon ![]() at the bottom of any course page. They can also click a source link to open the source you set in the Source library
at the bottom of any course page. They can also click a source link to open the source you set in the Source library ![]() .
.
Click here to read more about finding and using reputable sources.

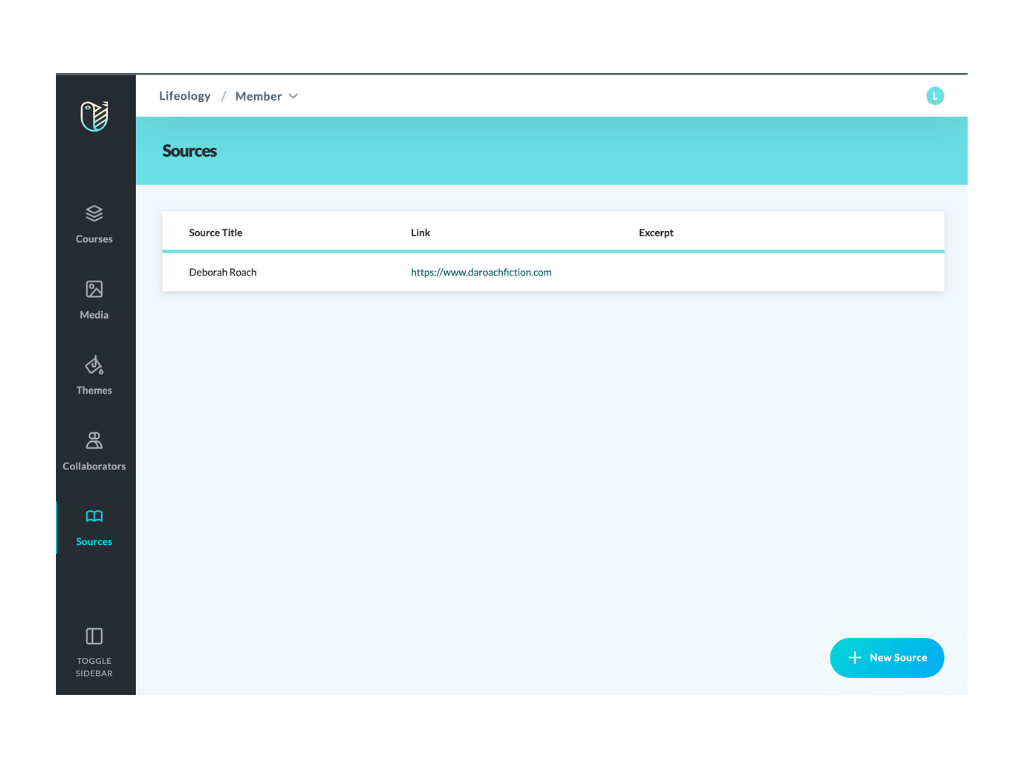
Add a Source to Your Course Library
To add a source to your course, you must first add the source to your Sources library. You can then attach the source to the course from the library.
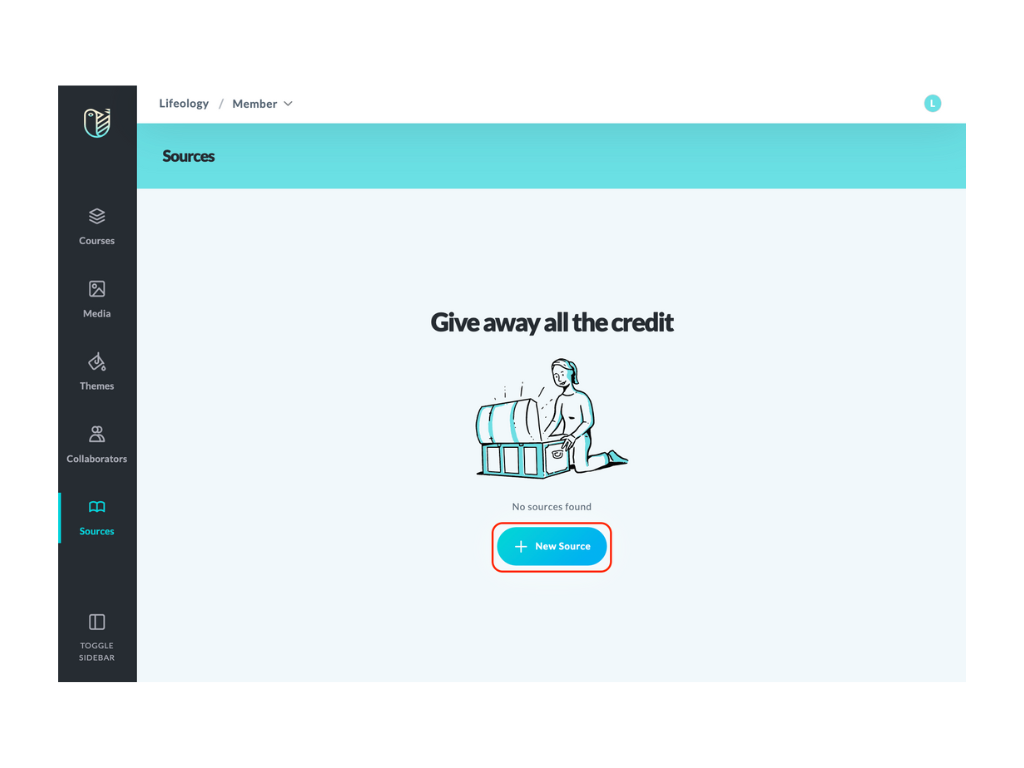
- Click on the Sources library
 from the side menu.
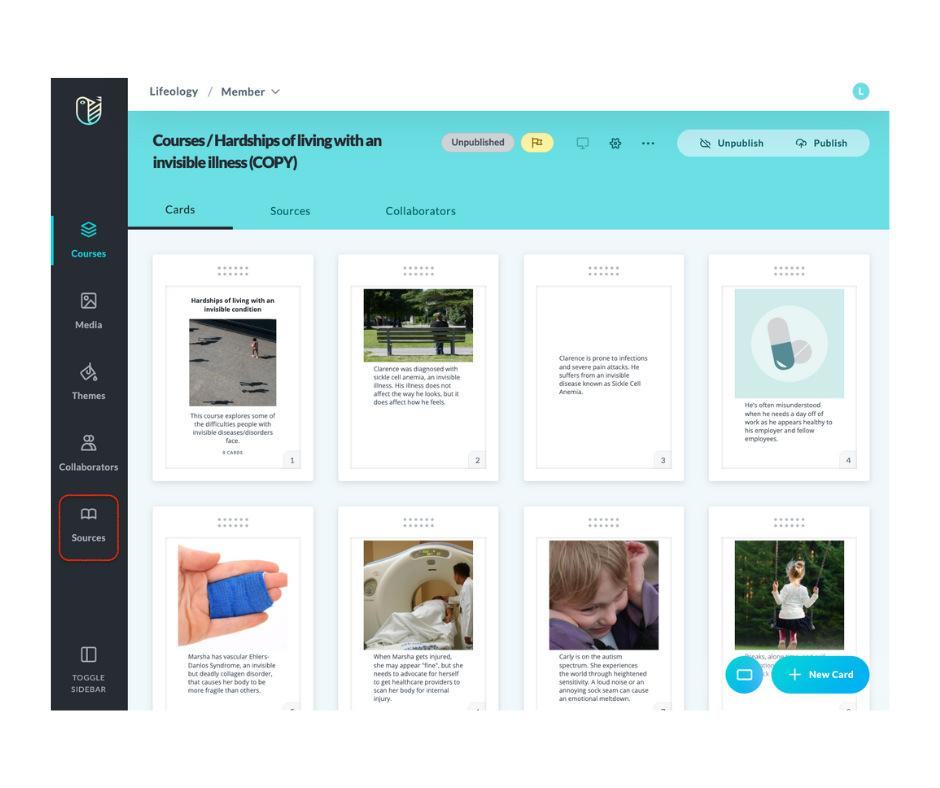
- On the screen that opens, click the + New Source button.
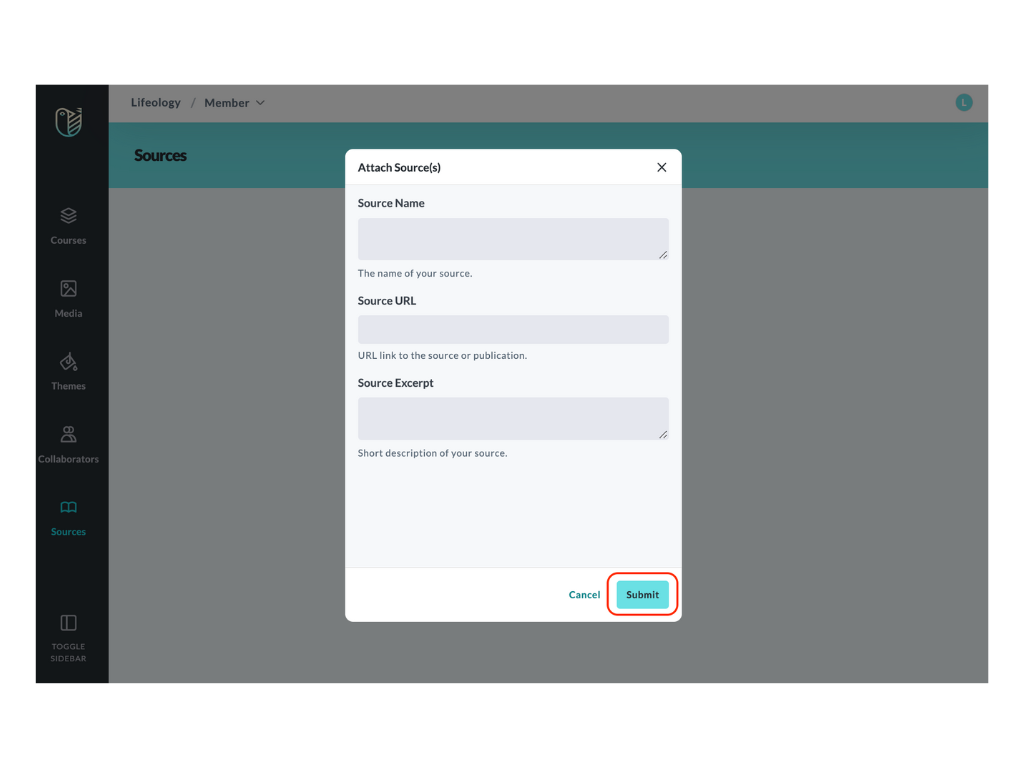
- In the window that opens, fill out the required information and click Submit (the excerpt is optional). URLs must begin with https:// or you will get an error.
- Your source is now listed in the Source library. Continue adding sources for your course or continue to the next step.
Attach a Source to Your Course
From within your course, you can either add a new source to attach to your course or attach a source from the Sources library ![]() .
.
- Click the Courses
 tab in the side menu. Hover your cursor on the course tile till it darkens, and click Edit Course.
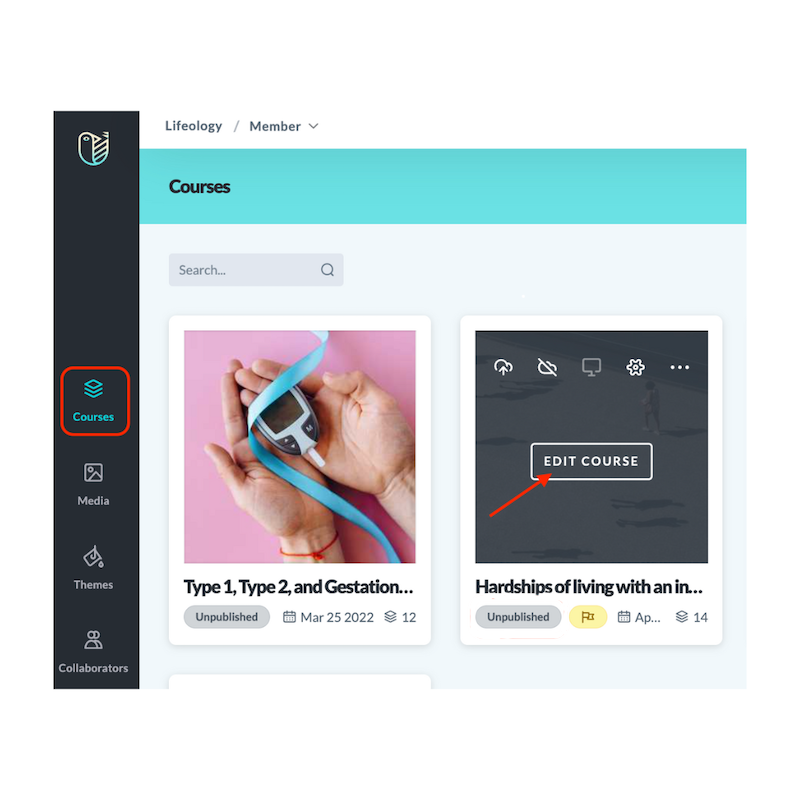
- While in the Courses library , click the Sources tab in the blue header. Then click + New Source to access the Sources library.
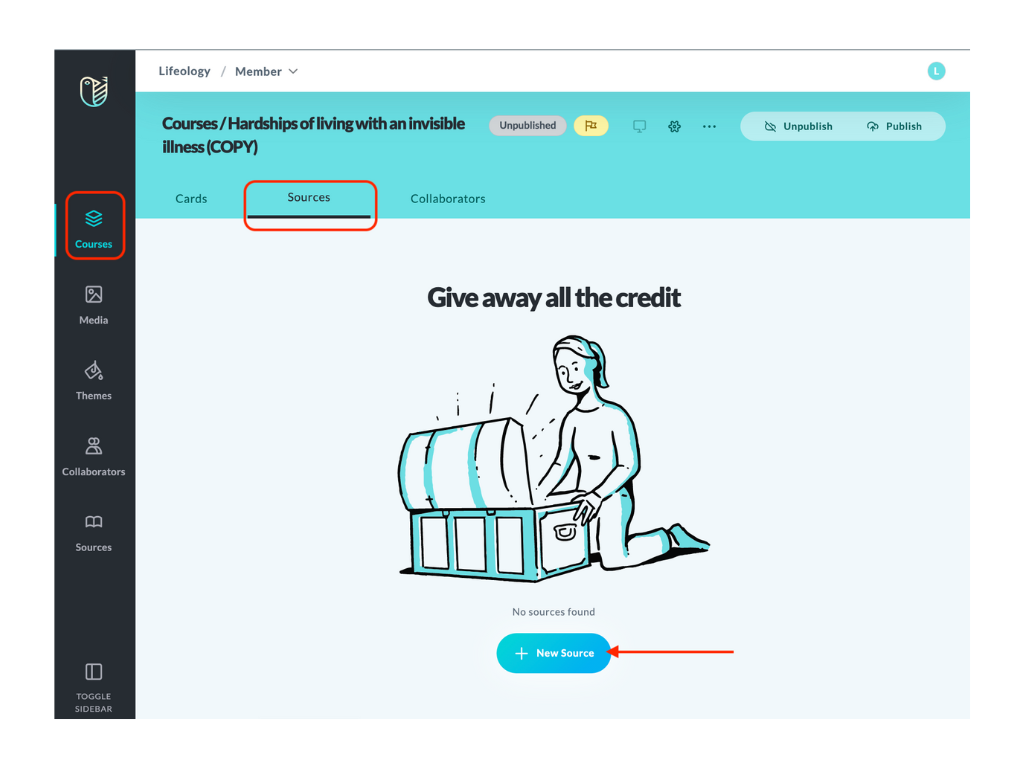
- In the window that opens, either:
- Create a new source
- Select +New Source
- Fill out the required fields
- Click Submit
This creates the source, stores it in the Sources library, and attaches it to the current course. (If adding a source to an existing published course, click Publish to update the published course).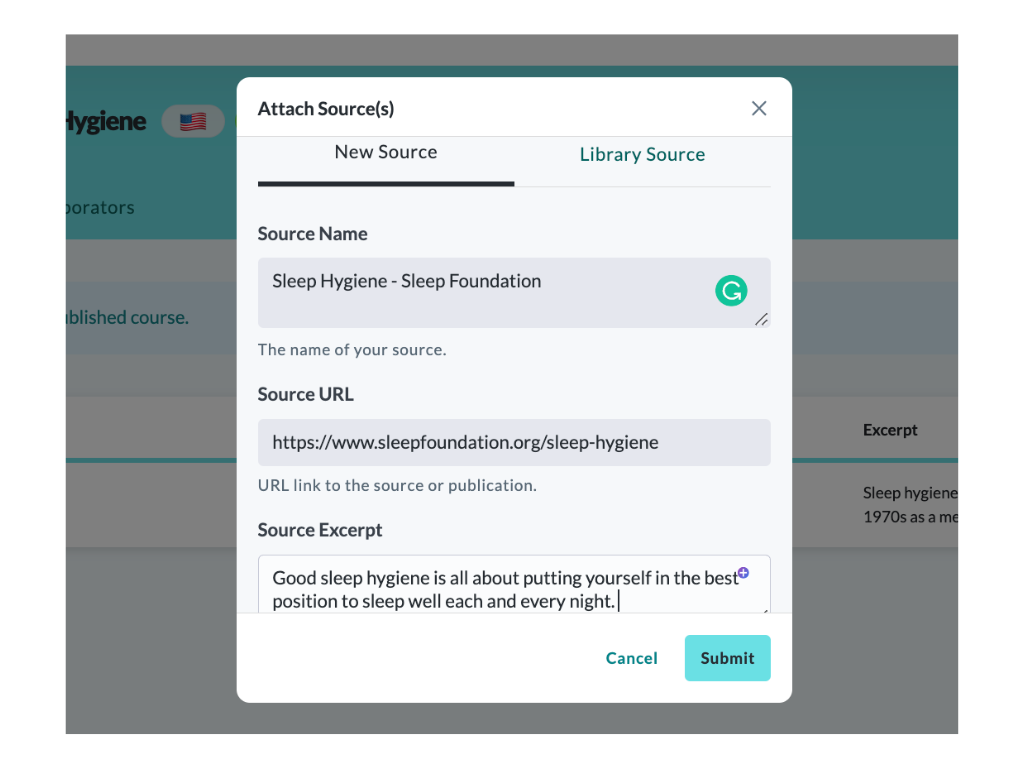
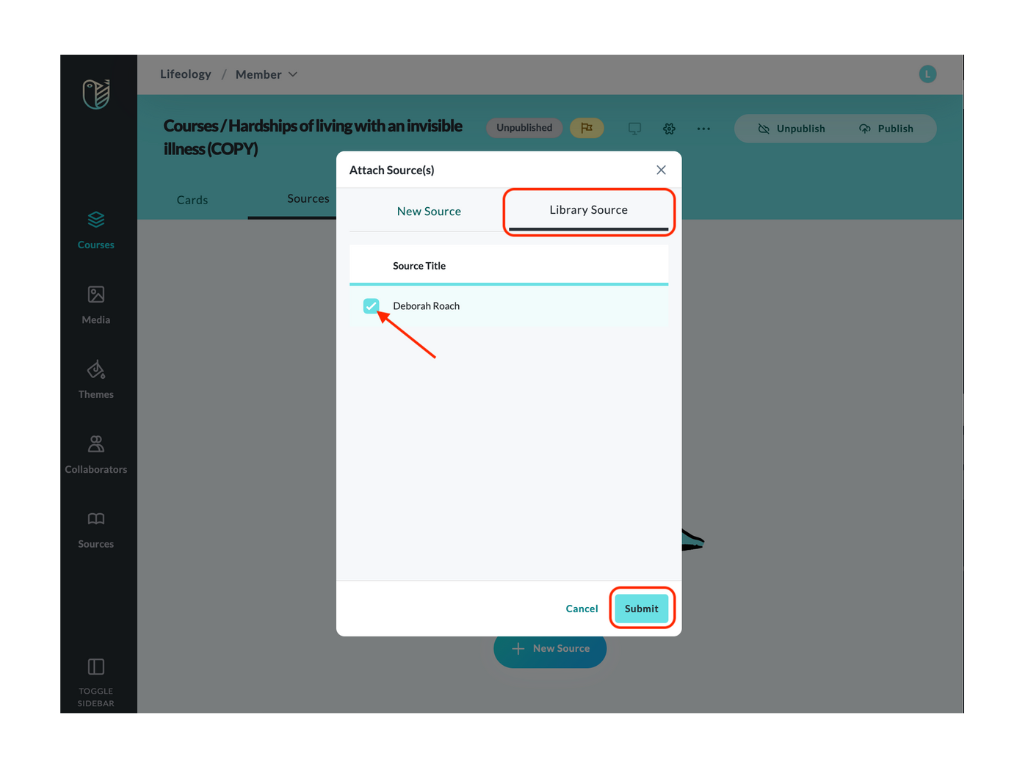
- Attach a source from the Source library
- Select the Library Source tab
- Select a source to attach
- Click Submit
- Create a new source
- You’ll return to the Courses page > Sources tab. A banner displays, “Sources will automatically be visible on the published course.”
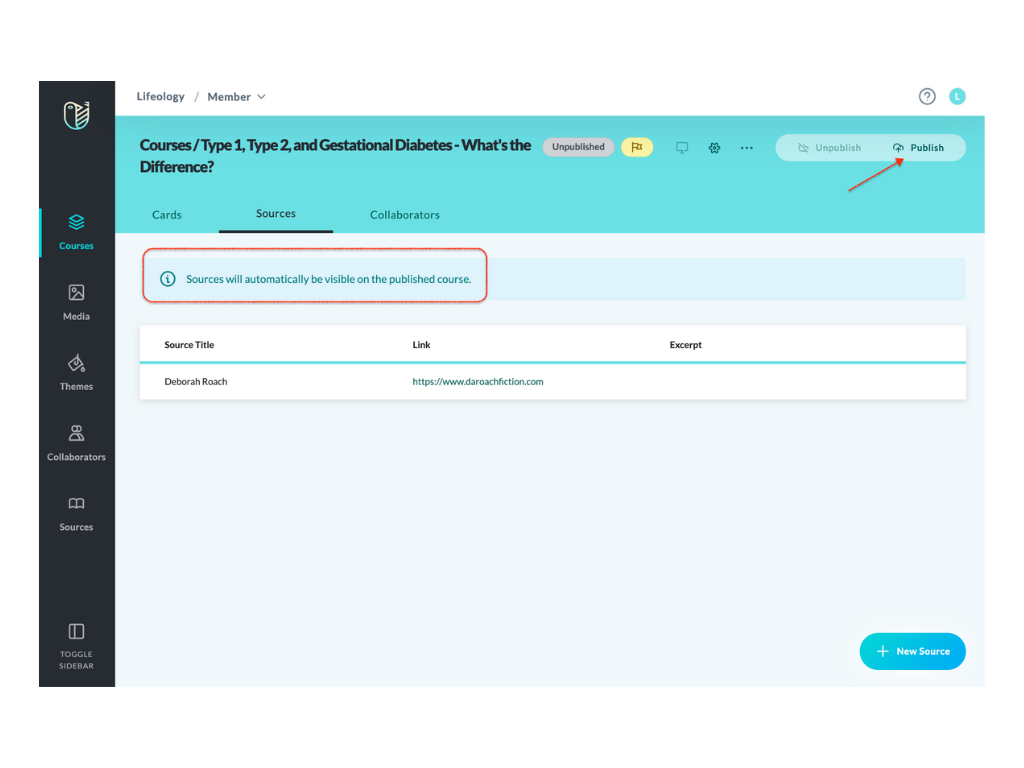
- When you are done, click Publish.
Note: When adding a source to a published course, click Publish to apply the changes to the published course.
Delete a Source from Your Course
Deleting a source from your course only detaches it, this action does NOT remove it from the Sources library.
- Open the course that contains the source you wish to remove:
- Navigate to the Courses library
- Hover your cursor on a course tile until it darkens and tools present
- Click Edit Course
- Navigate to the Courses library
- Click the Sources tab in the blue header.
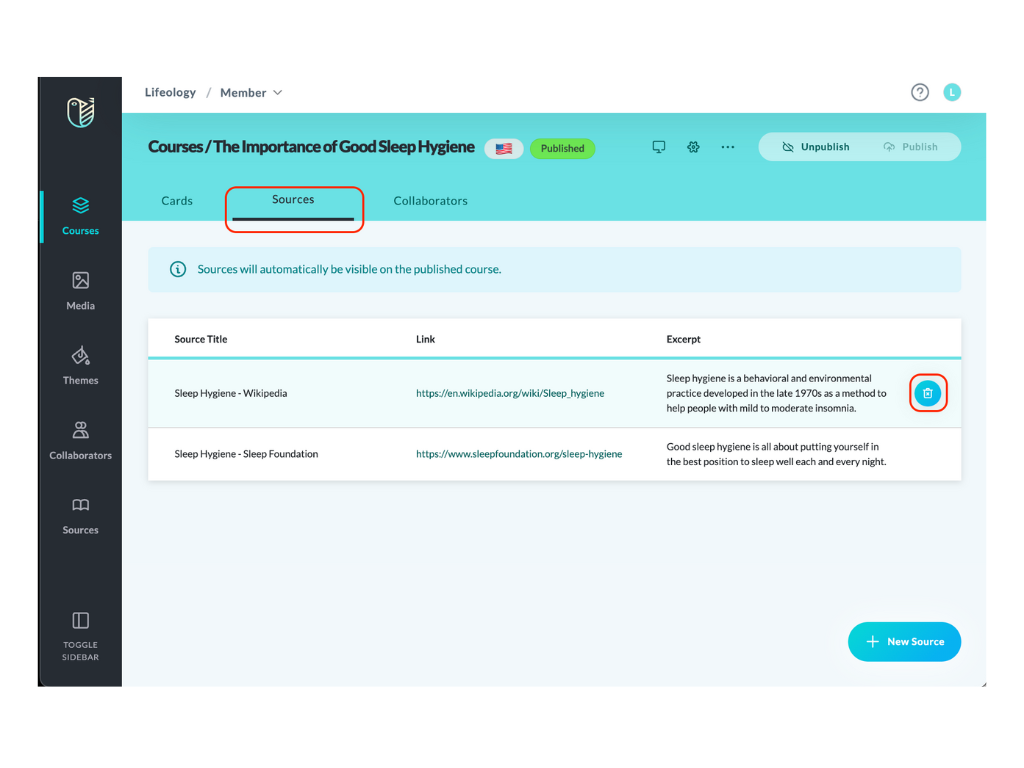
- Hover your cursor on a source line and click the delete icon
 .
. - In the window that opens, confirm you want to delete the source by clicking Delete.
- If this change was made to a published course, you’ll need to click the Publish button to republish it with the latest changes (a yellow “pending changes”
 icon alerts this in the header).
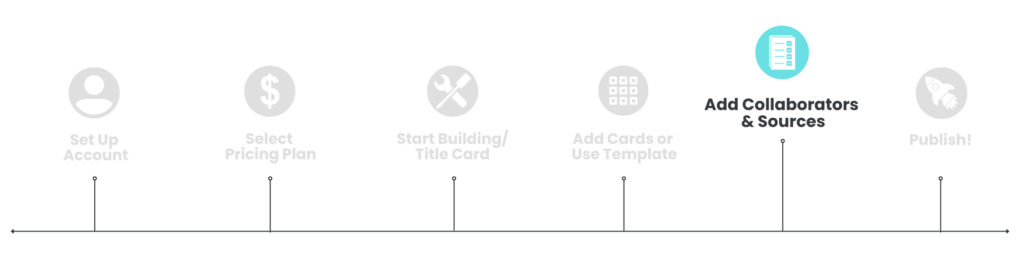
Next: Adding Collaborators