

In this article, you’ll learn how to:
Paid subscription users have the option of setting and customizing the theme used for their course. This includes adjusting colors and adding a logo to be displayed along the top of your course to compliment your branding. Also, Themes is where you can toggle off a course’s Allow Sharing and Allow Printing buttons, hiding them from your audience.
Note: Toggling off the Allow Sharing and Allow Printing buttons for a course does not block sharing. Users will still be able to copy and share the URL. Toggling these buttons off simply removes them from the audience’s view.
How to add or Edit a Theme for your Course
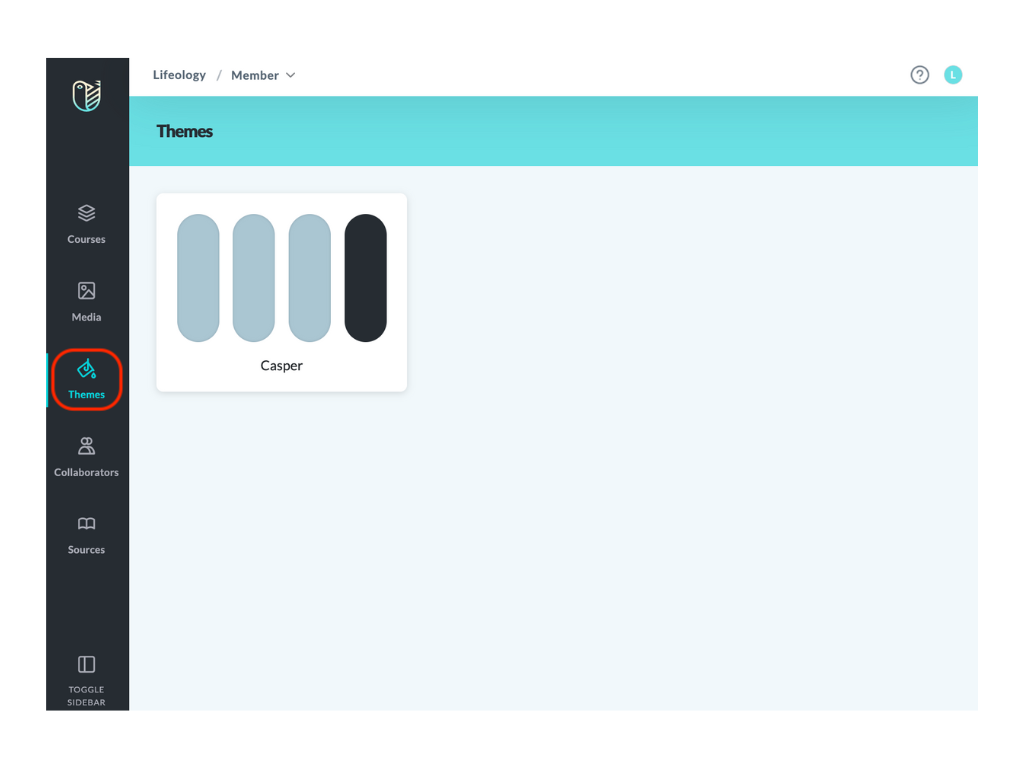
- Click Themes in the side panel.
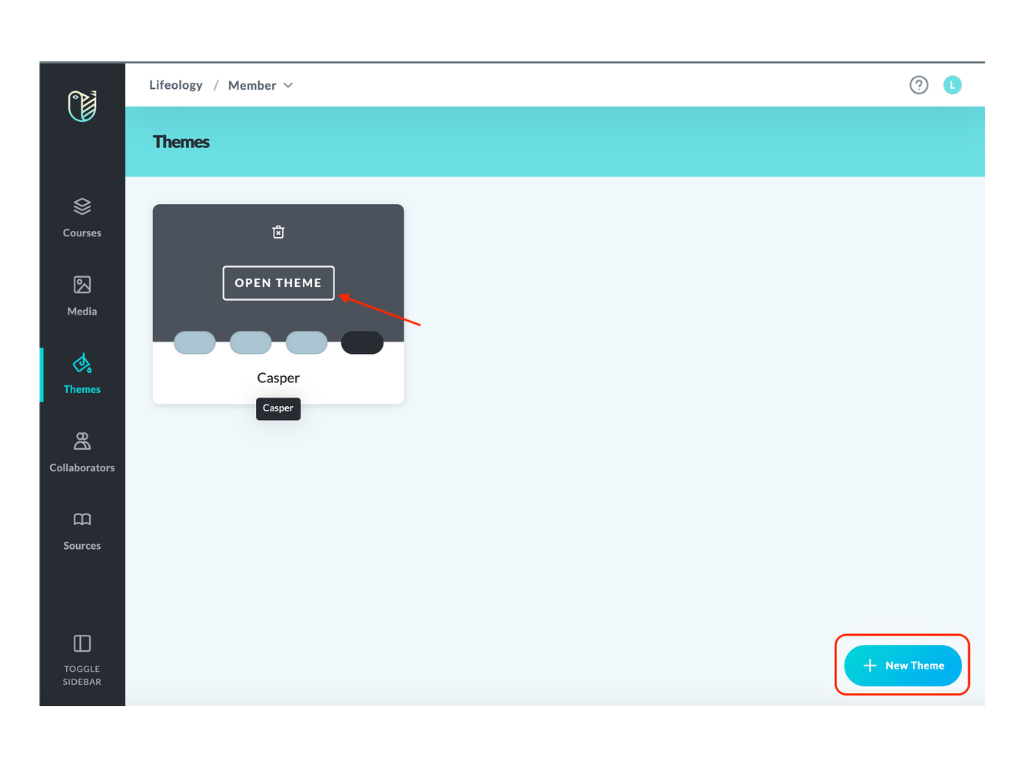
- To edit an existing theme, hover your cursor on a theme, then click Open Theme, OR to add a new theme, click the + New Theme at the bottom of the screen.
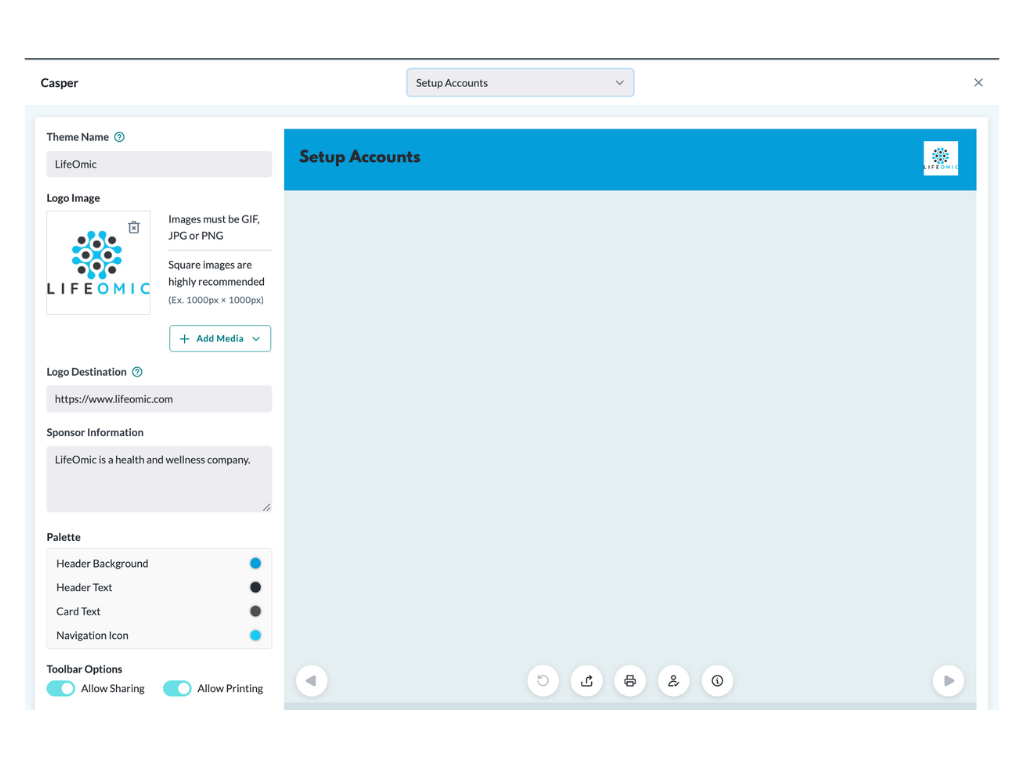
- Fill out the settings and select the colors to match your branding. You can select a course in the top dropdown to preview the colors and branding.
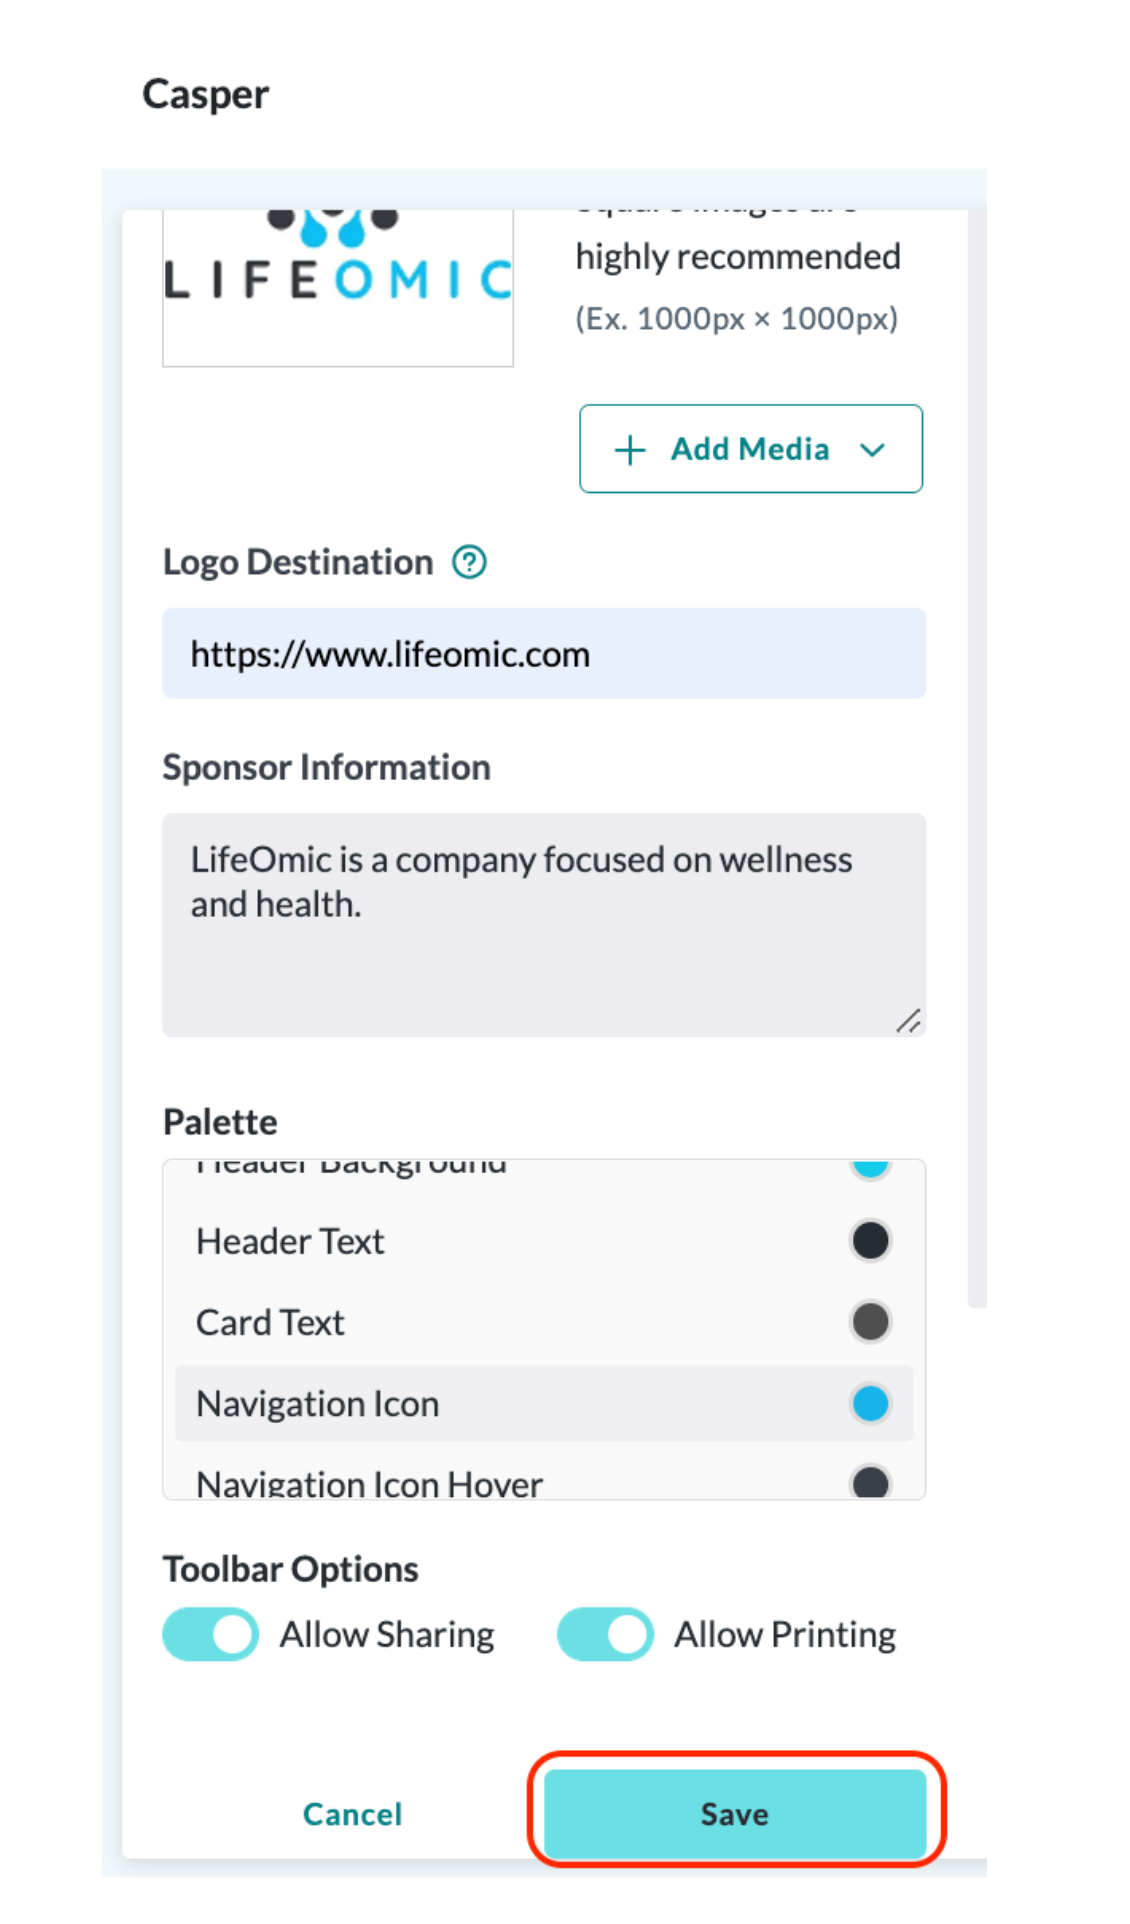
- Click Save at the bottom of the settings panel.
Note: Toolbar Options can be toggled on to allow buttons for Allow Sharing and Allow Printing to be added to the bottom of every card of your course. If toggled on, users can click the corresponding icon (share or print
  ) on any course card to open either a print preview window of the card deck or a share link for the course (demonstrated below).
- To add your theme to a course, click the Courses icon
 in the side panel.
 - Click on the Course settings icon
 . This can be accessed from:
- The Courses page – Hover your cursor on a course tile till it darkens then click the course settings icon .

- Within a Course – Hover your cursor on a course tile till it darkens, then click the Edit Course button. On the course page that opens, click the course settings icon at the top of the page.
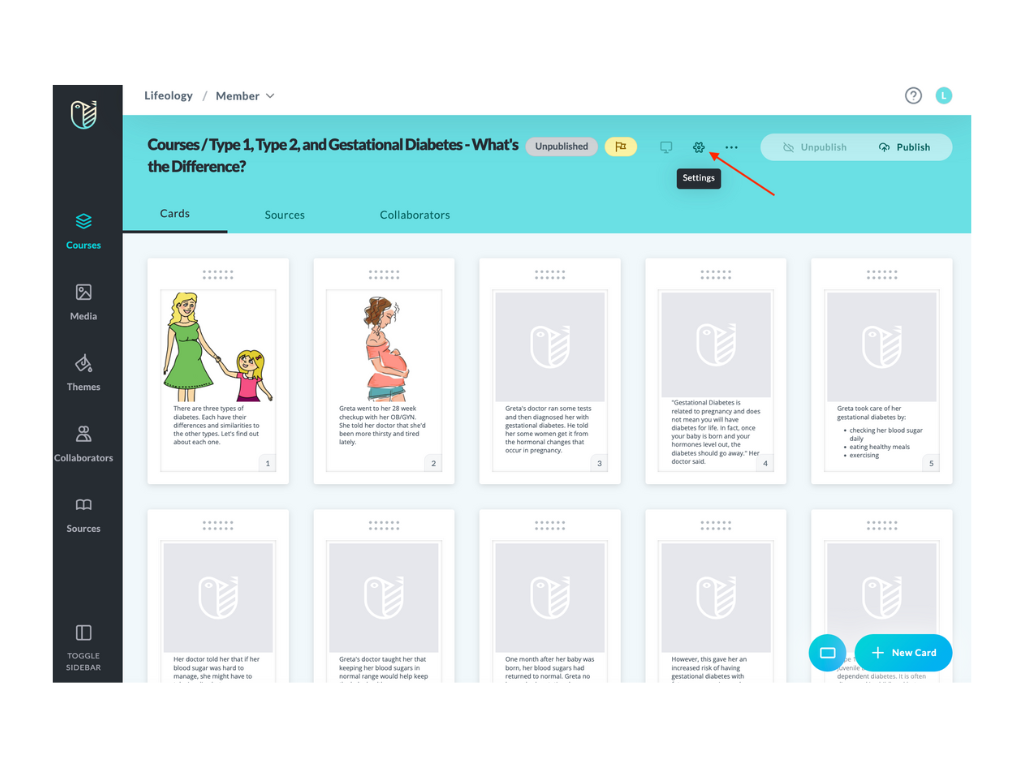
- The Courses page – Hover your cursor on a course tile till it darkens then click the course settings icon
- In the popup window that opens, use the Theme dropdown menu to select the theme you want for this course.
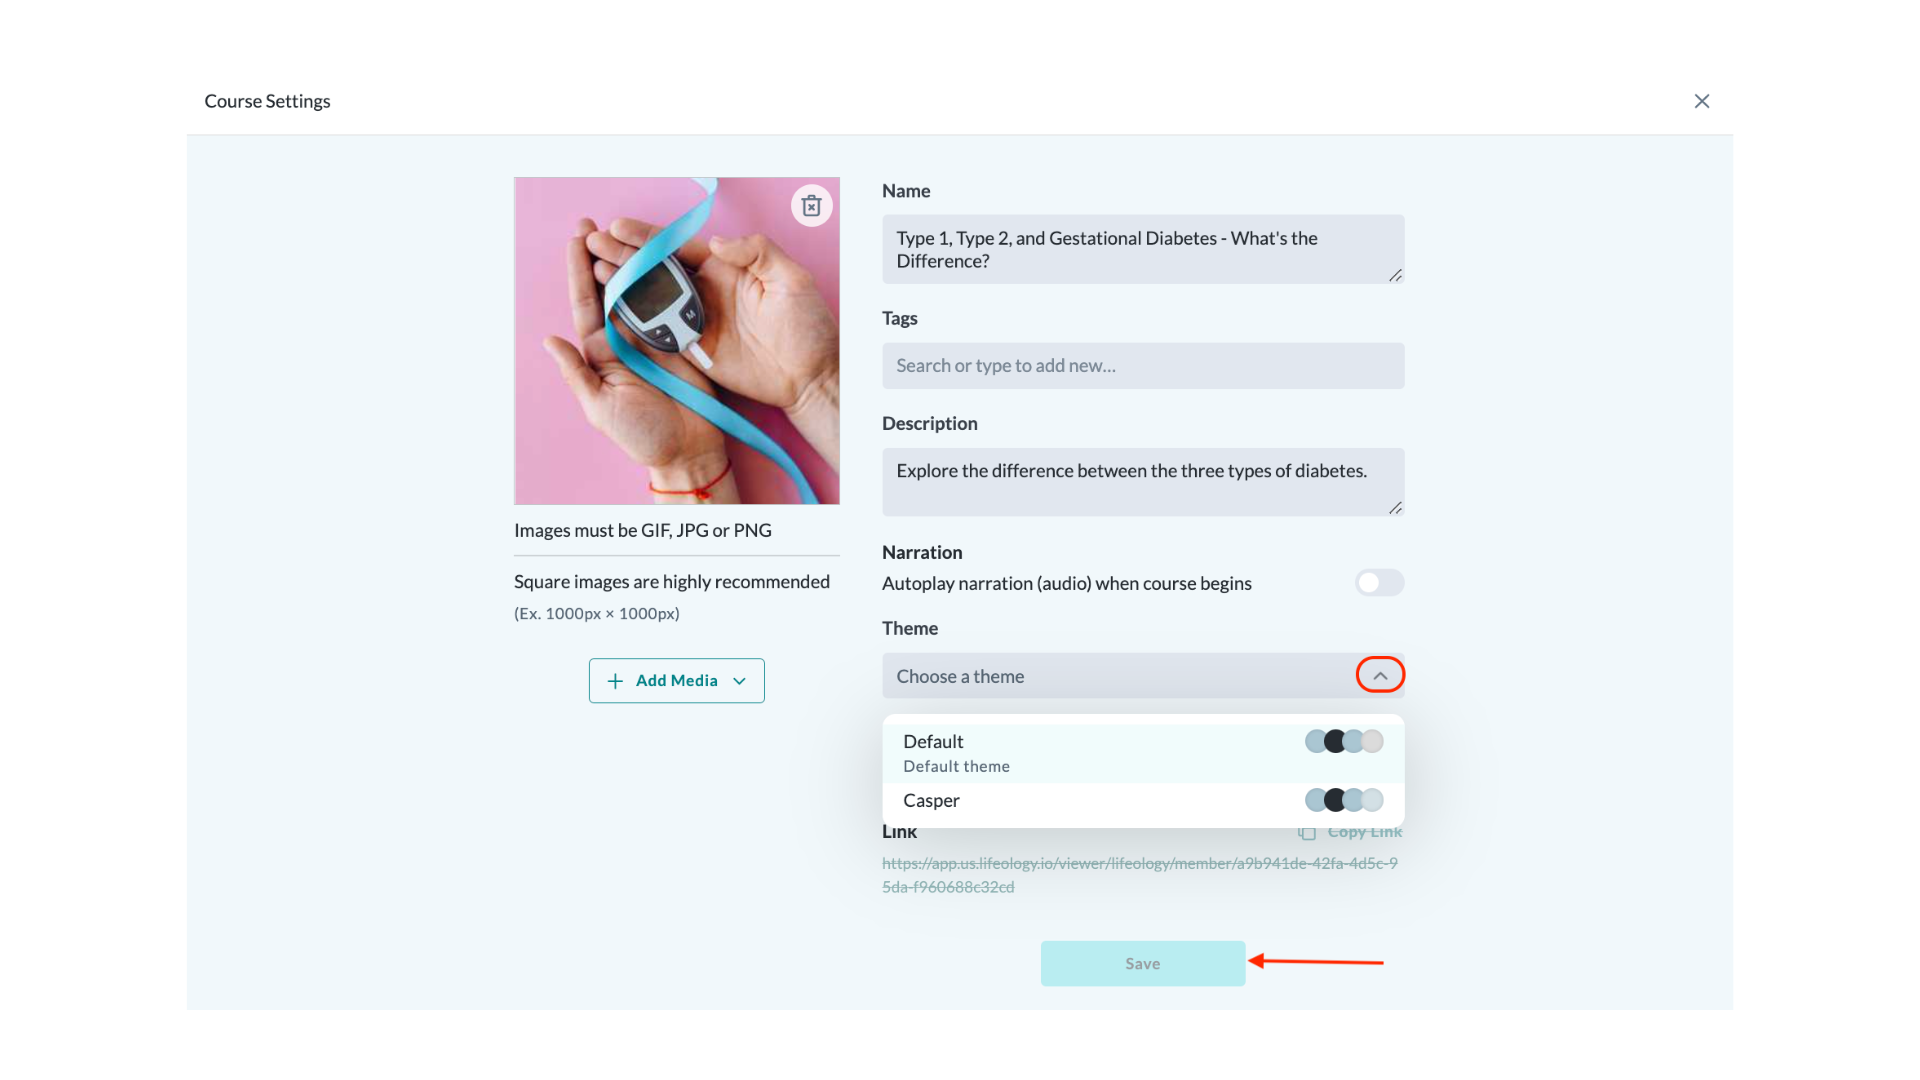
- Click Save.