In this article, you’ll learn how to:
- Share or print a published course you’ve built
- Share or print your published course as an audience member
- Disable your audience’s ability to print and share a course
Once you’ve published a course you can share it using one of the following methods:
Share Within a Course
- Open a course.
- Click the … in the header.
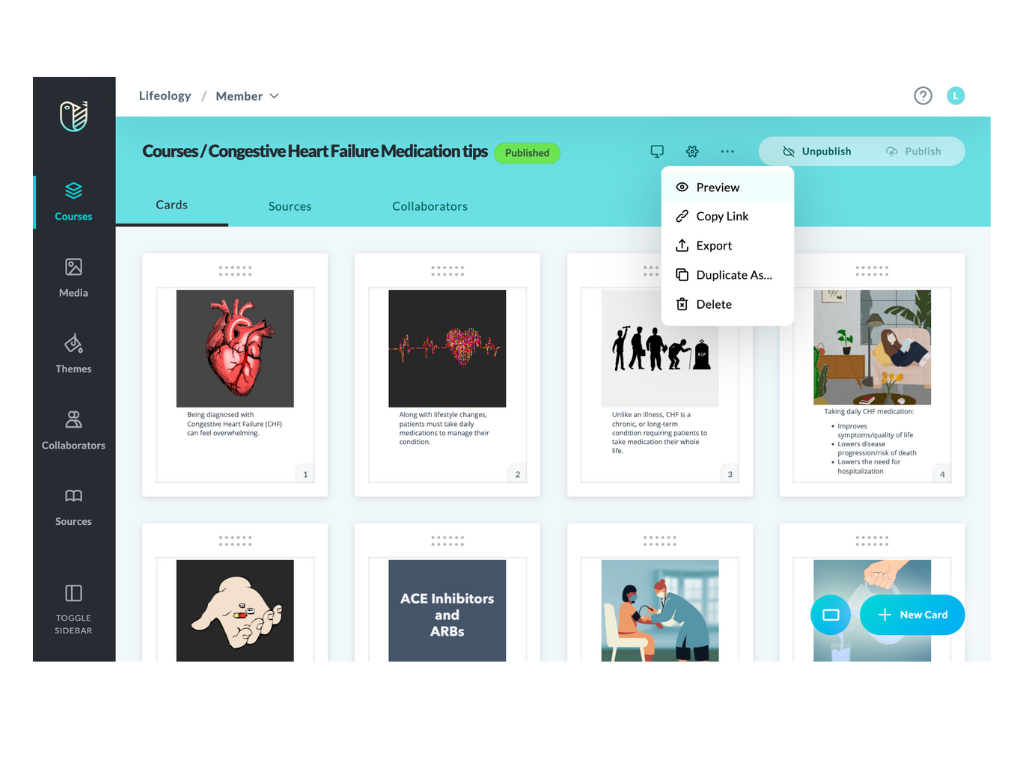
- Select either:
- Copy Link
 – Copies a shareable course link to your clipboard
 - Export
 – Saves the course as a zip file on your computer
- Copy Link
Share From the Courses Page
- Hover your cursor on a course. The course tile will darken and you’ll see tools available to you.
- Click the … to open the options.
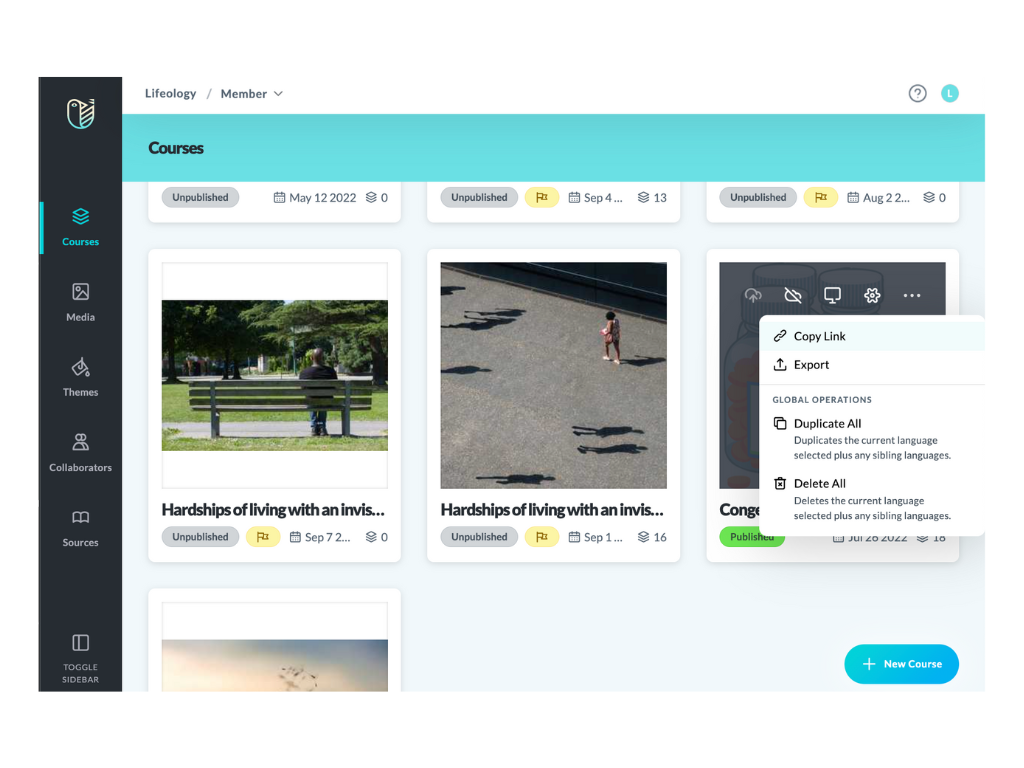
- Select either:
- Copy Link (copies a course URL to the clipboard)
- Export (saves a zip file of the course on your computer)
- Copy Link
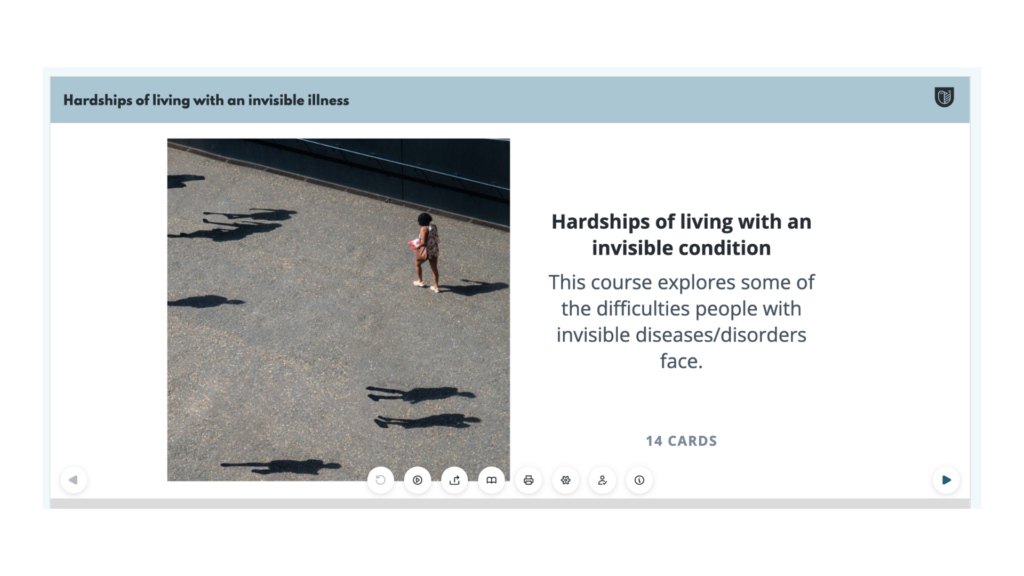
By default, users can access the following share tools from the bottom of any card in the course:
– Share ![]() – Lets you share the course on social media or copy an embed code to your clipboard
– Lets you share the course on social media or copy an embed code to your clipboard
– Print ![]() – Lets you print your course
– Lets you print your course
If an audience member clicks the Share ![]() icon at the bottom of the course card, they will be able to select a social media platform to share it on or select the Embed Code tab to copy the code to the clipboard and embed on a site. They can also click the Print
icon at the bottom of the course card, they will be able to select a social media platform to share it on or select the Embed Code tab to copy the code to the clipboard and embed on a site. They can also click the Print ![]() icon to open the print dialog box where they can print the entire course.
icon to open the print dialog box where they can print the entire course.
Users with paid tiers can toggle the share and/or print options off to keep their course private. This is done from the Themes tab.
Note: The share and print options (toggled on or off) are tied to the theme. Meaning all courses with an assigned theme will be effected the same.
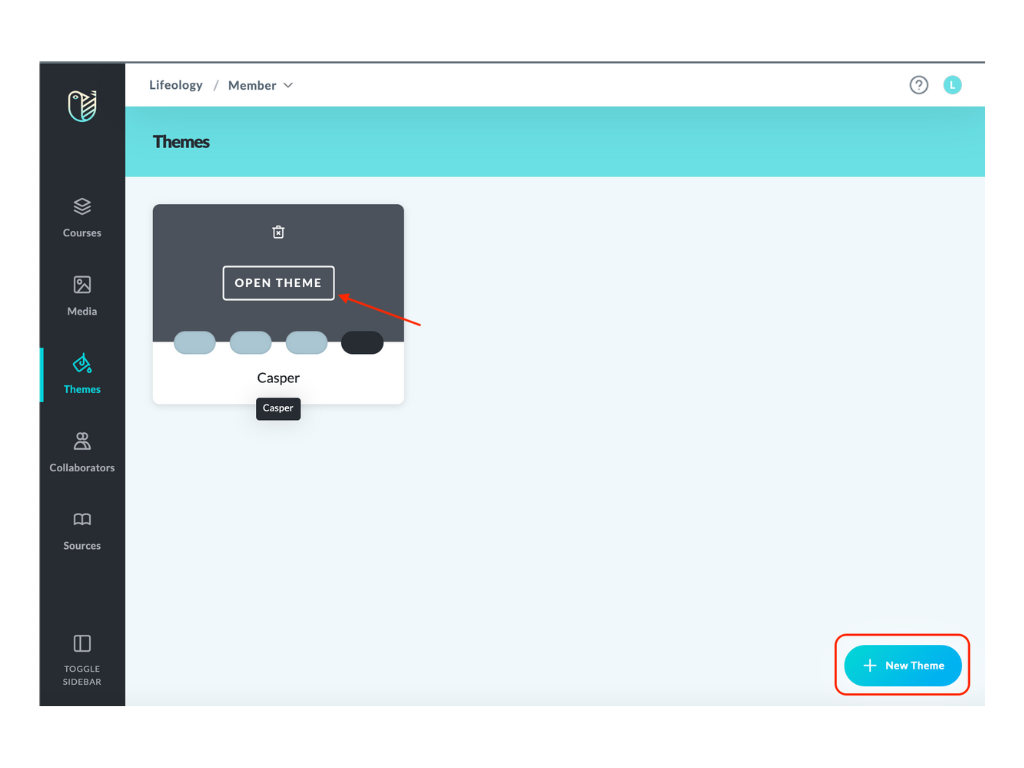
- Click Themes from the sidebar.
- Either:
- Open an existing theme – Hover your cursor on the theme tile till is darkens, then click Open Theme.
- Create a new theme – Click the + New Theme button at the bottom of the screen.
- Make any selections and under the Toolbar Options (at the bottom of the theme settings menu), toggle off the print and/or share options.
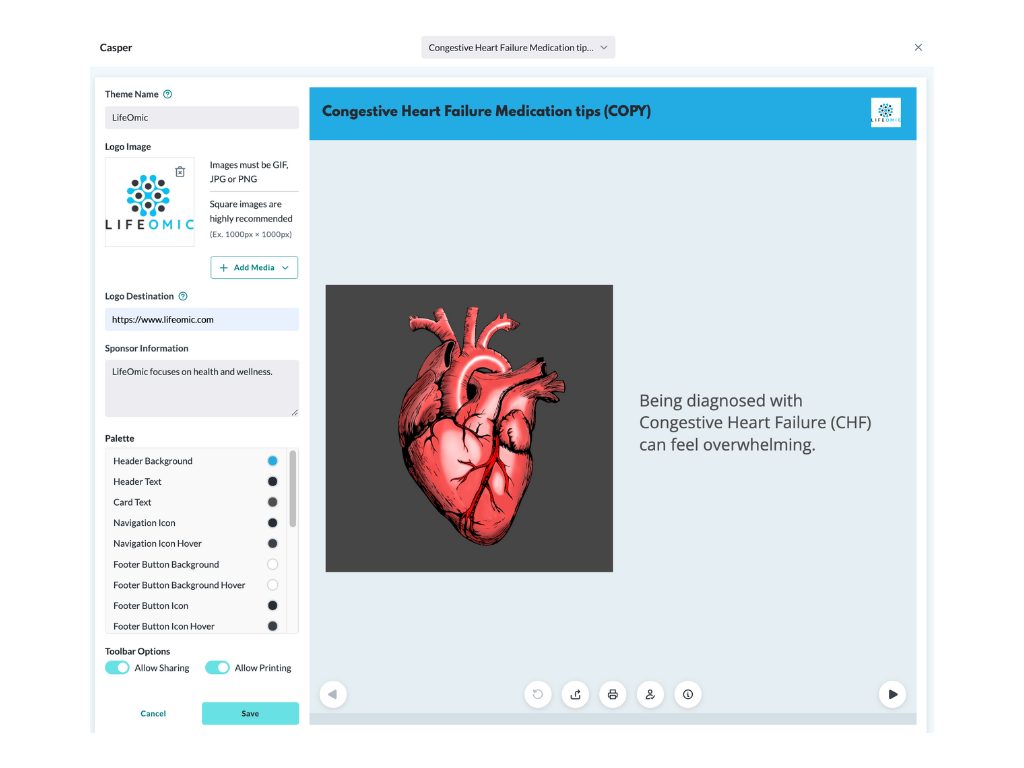
- Click Save.
- Set your theme for your course. Click the Courses tab from the sidebar.
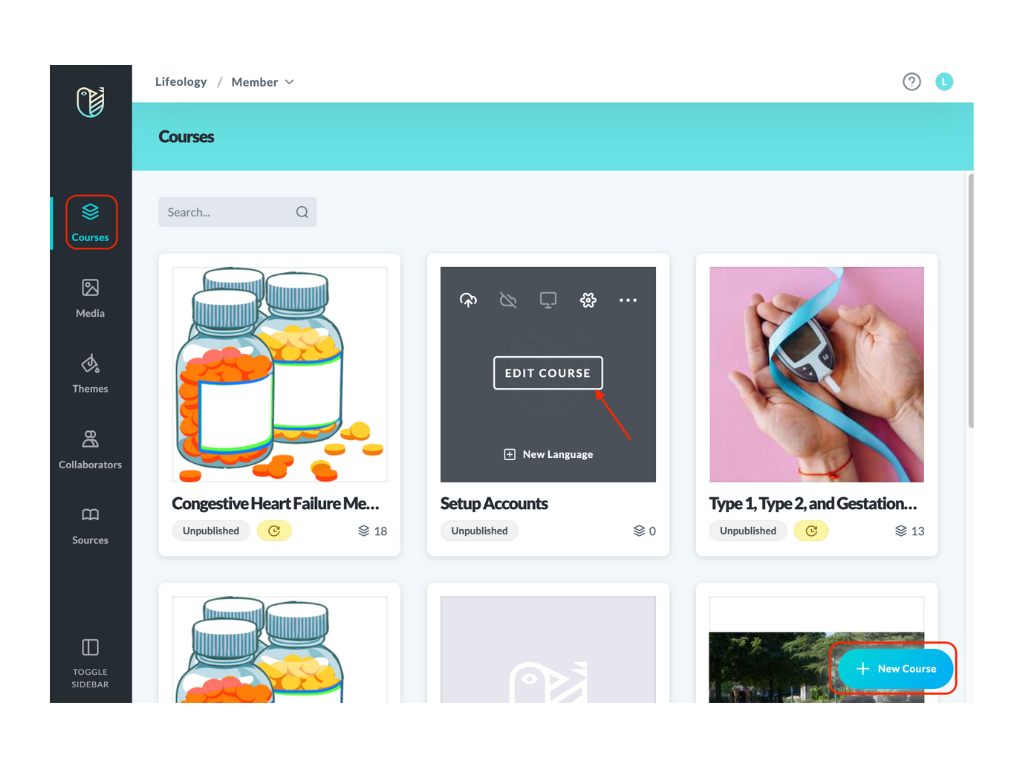
- Either:
- Open an existing course – Hover your cursor on the course tile till it darkens and presents tools. Click Edit Course.
- Create a new course – Click the + New Course button at the bottom right of the screen and build your course.
- Click the Course settings icon in the header.
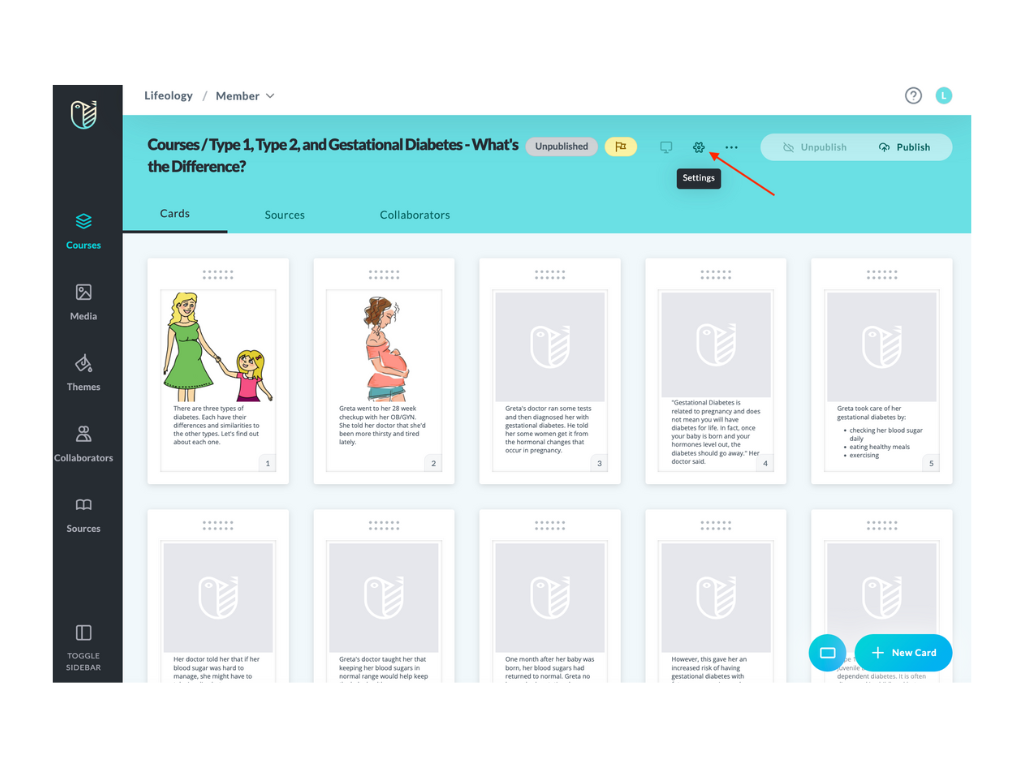
- From the Theme dropdown, click the chevron to open the list of themes and select your new theme.
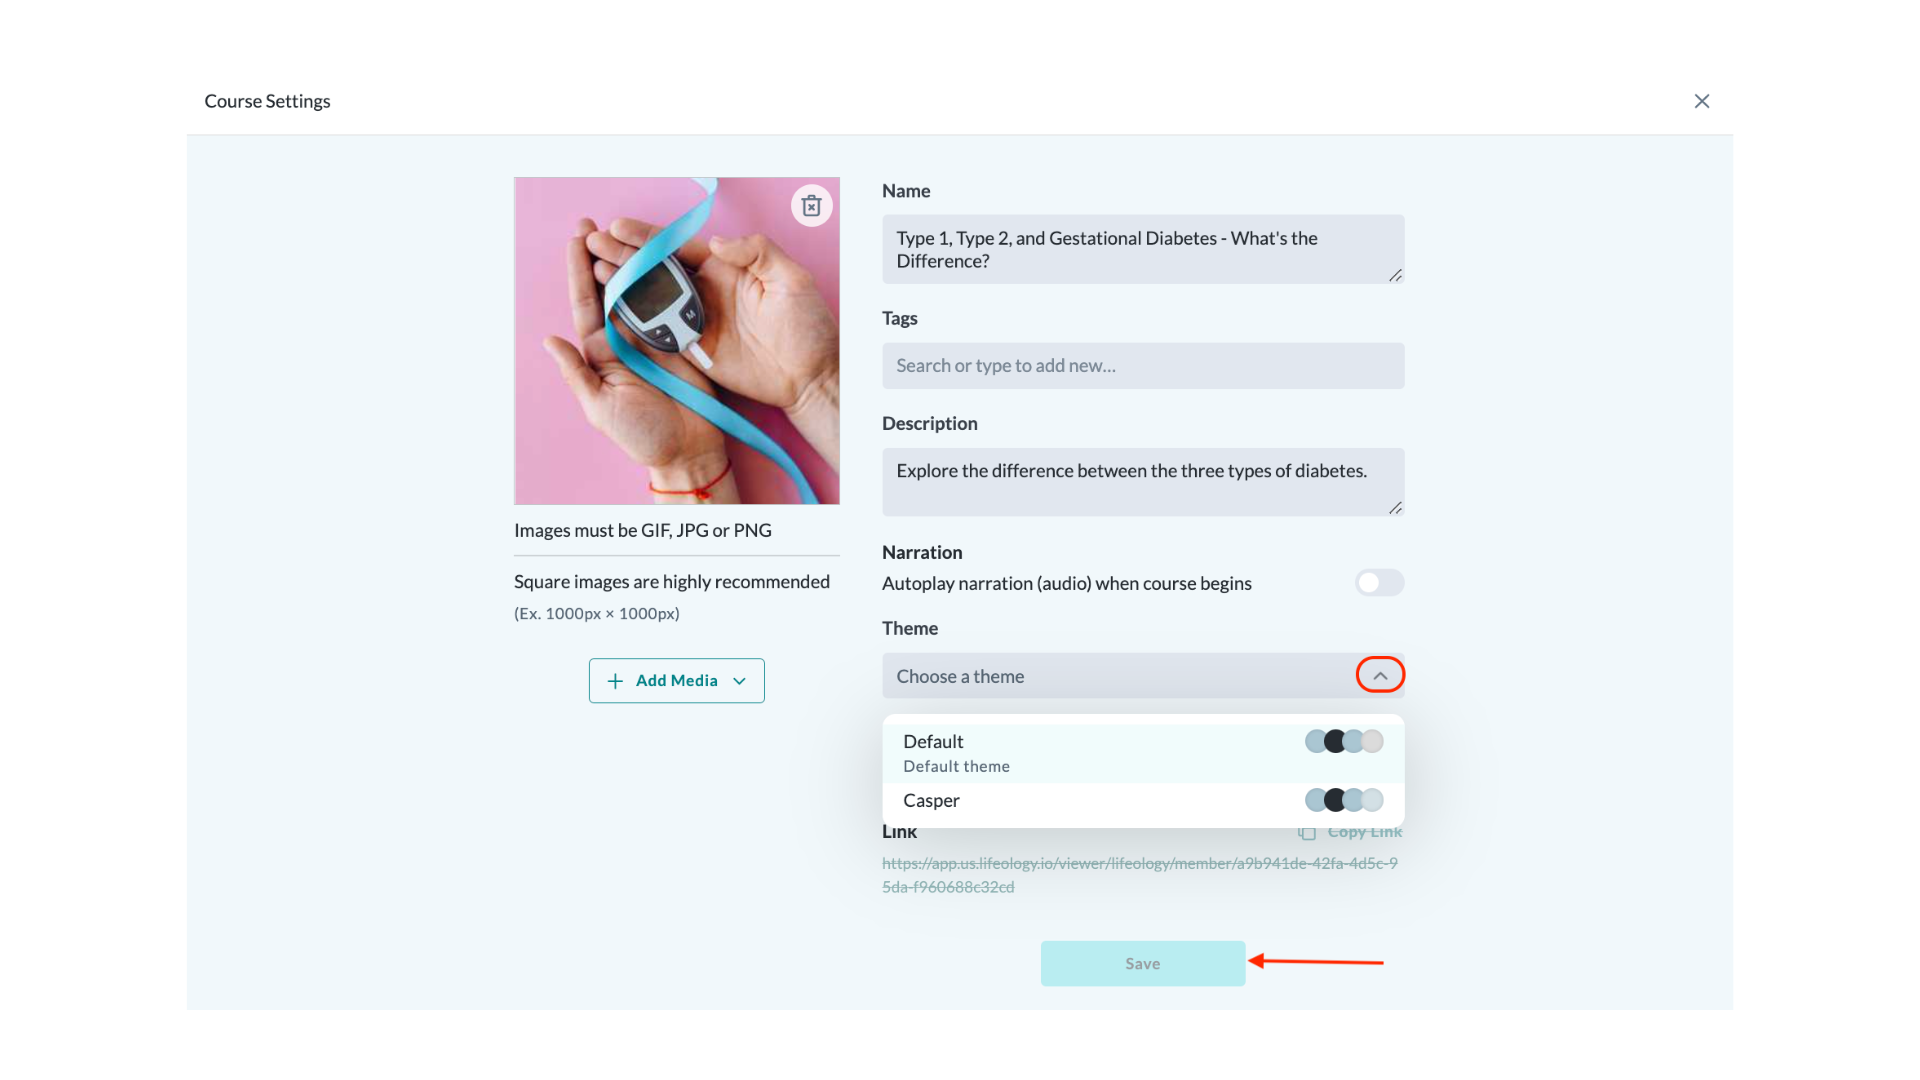
- Click Save on the Theme settings page.
Note: If this course was previously published and you made changes to it, you must publish the course again.