
In this article, you’ll learn about:
- Accessibility features offered
- Reduced Motion and how add it
- Alt Text and how to add it to your images
Accessibility Features
Lifeology offers several accessibility features to help you build a course that can reach a wider audience. These features include:
- Narration that can be added to each card in your course
- Reduced Motion, toggling this setting on provides a smoother transition of animations (as seen in card transitions in a course) which may be useful for individuals with vestibular issues
- Alt Text, or a description of an image, that can be added to images to improve the course experience for visually impaired individuals or display when images are not loading on a page
- A contrast between foreground and background colors in our Builder to meet WCAG 2 AA contrast ratio thresholds for visually impaired admins
Reduced Motion
Admins and users with vestibular issues can benefit from the Reduced Motion feature configured in our Builder and course cards. This option gives a more subtle transition between screens and cards. Admins and users must toggle on these settings in their operating systems by one of the following methods:
- GTK/GNOME: GNOME Tweaks > General tab (or Appearance, depending on the version) > Animations is turned off.
Alternatively, add gtk-enable-animations = false to the [Settings] block of the GTK 3 configuration file. – In Plasma/KDE: System Settings > Workspace Behavior -> General Behavior > “Animation speed” is set all the way to the right to “Instant”. - Windows 10: Settings > Ease of Access > Display > Show animations in Windows.
- Windows 11: Settings > Accessibility > Visual Effects > Animation Effects
- Windows 7: Control Panel > Ease of Access > Make the computer easier to see > Turn off all unnecessary animations (when possible).
- macOS: System Preferences > Accessibility > Display > Reduce motion.
- iOS: Settings > General > Accessibility > Reduce Motion.
- Android 9+: Settings > Accessibility > Remove animations.
- Firefox about:config: Add a number preference called ui.prefersReducedMotion and set its value to either 0 for full animation or 1 to indicate a preference for reduced motion. Changes to this preference take effect immediately.
Admin’s experience of Reduced Motion:
User’s experience of Reduced Motion:
Alt Text
Alt Text (also called alt tags and alt descriptions) is a written text that appears in place of an image on a webpage if the image fails to load on a user’s screen. This text also helps screen-reading tools describe images to visually impaired readers and allows search engines to better crawl and rank your website.
Add Alt Text Within a Card
- While adding or editing a card within a course, add Alt Text to the card image by clicking in the Alt Text box beneath the image. Alt Text should be descriptive of what the picture shows.
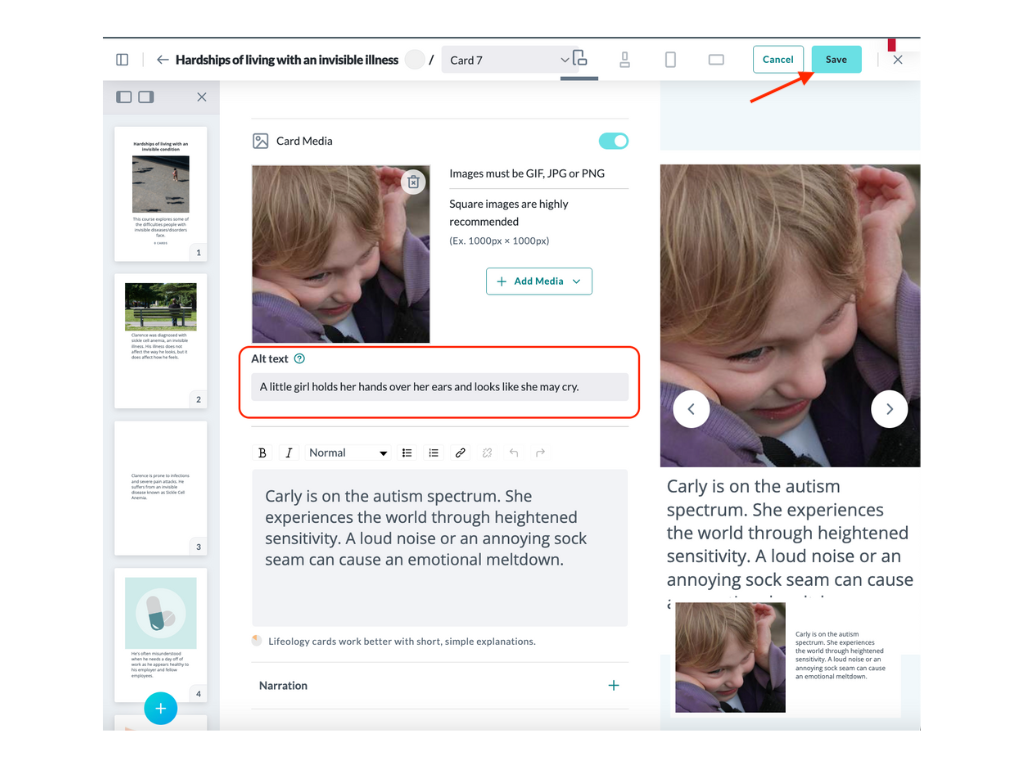
- Click the Save button at the top right of the page.
- Continue building or editing your course, or if you are finished, publish it.