In this article, you’ll learn how to:
What is a Course Stack?
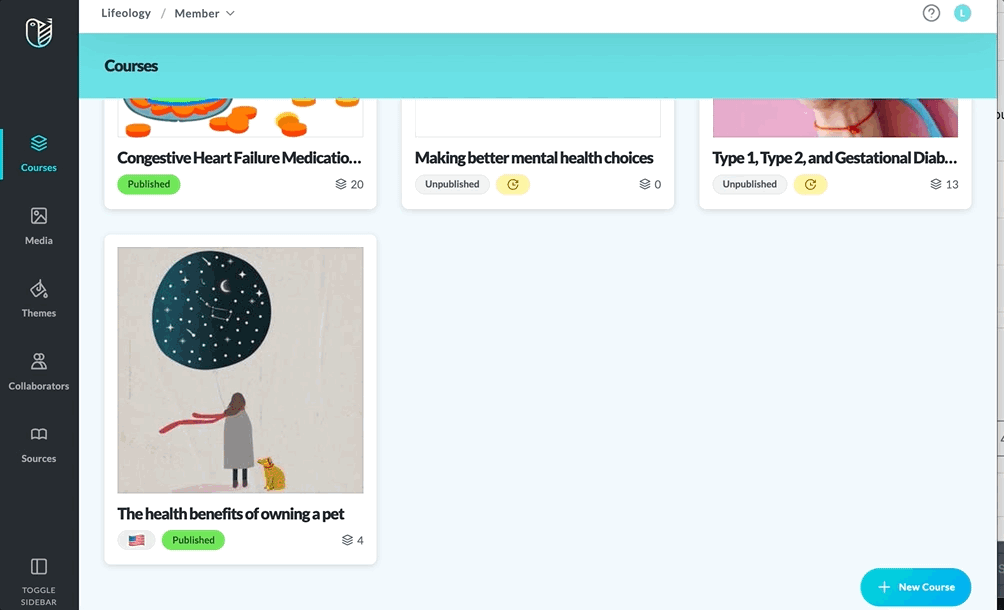
A Course Stack is a stack of language versions for your course. When a Course is made, a tile for it appears on the Courses Page ![]() of the Builder. Any additional language versions created for the course will be stacked behind the initial course.
of the Builder. Any additional language versions created for the course will be stacked behind the initial course.
Add a New Language to Your Course Stack and Translate it
To offer your course in other languages, you’ll make a new “version” of the course that can be translated and published. Language versions are stacked behind the original course on the Courses page ![]() and can be selected from the course tile language dropdown. Each language version of the course gets:
and can be selected from the course tile language dropdown. Each language version of the course gets:
- A language flag
 added to the course tile
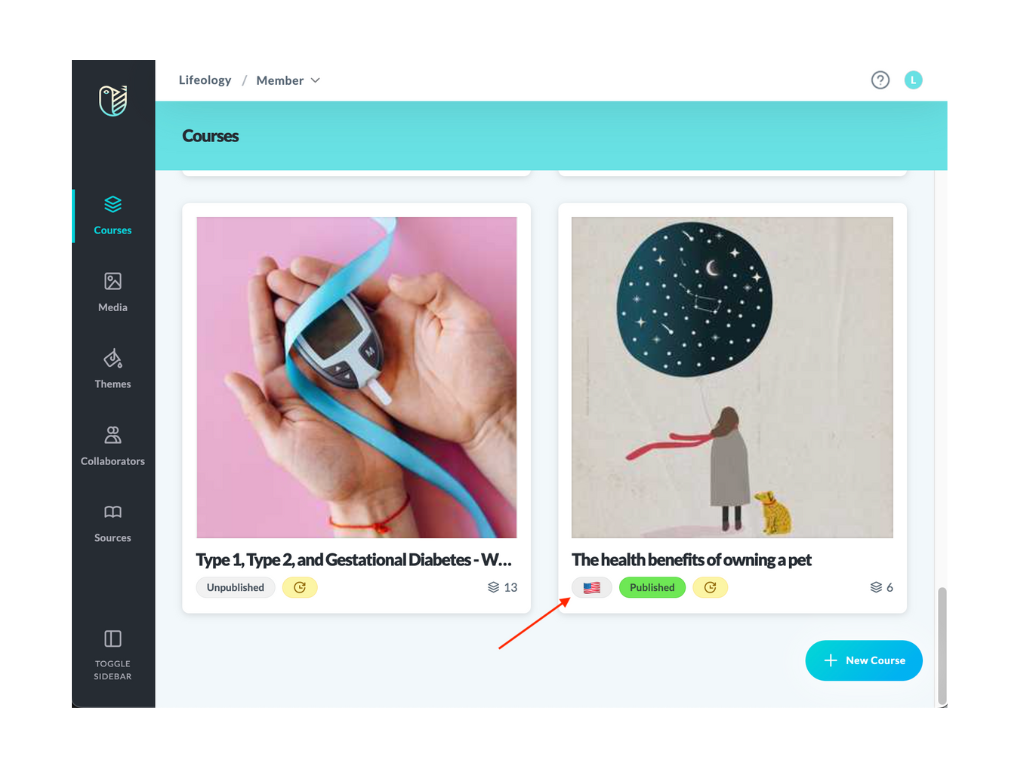
- A suffix added to the URL corresponding with the selected language (for instance, United States, English would get en-US added to the end of the URL)

There are two ways to add a new language version to your course stack but the end results differ:
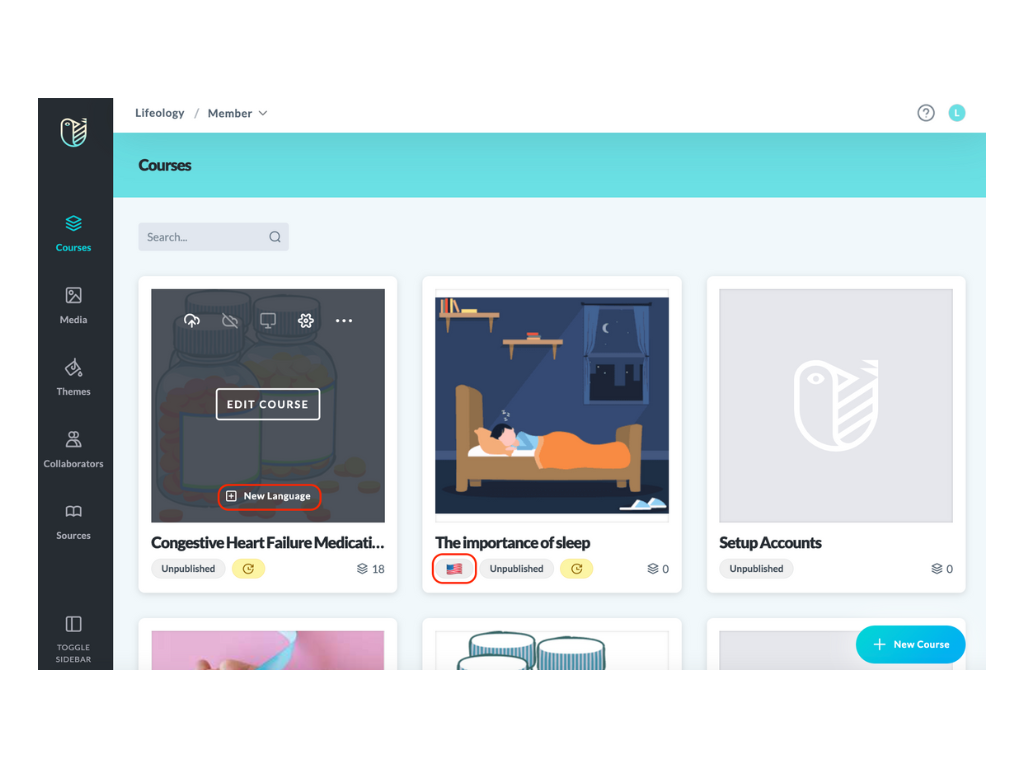
- +New Language button on course tile – This method creates a blank language version for your course. The title and description copy over from the original course but any settings, cards, or media do not.
- Duplicate As… – This method allows you to select a language and copy the entire course into a new language version that is stacked behind the original course. Everything from the initial course copies to the new version, including cards, media, and settings. All card content will copy over in the same language as the original course or users can check the Translate All checkbox to auto-translate the content on every course card. A card can also be individually translated.
Create a new Language Version using the +New Language Button:
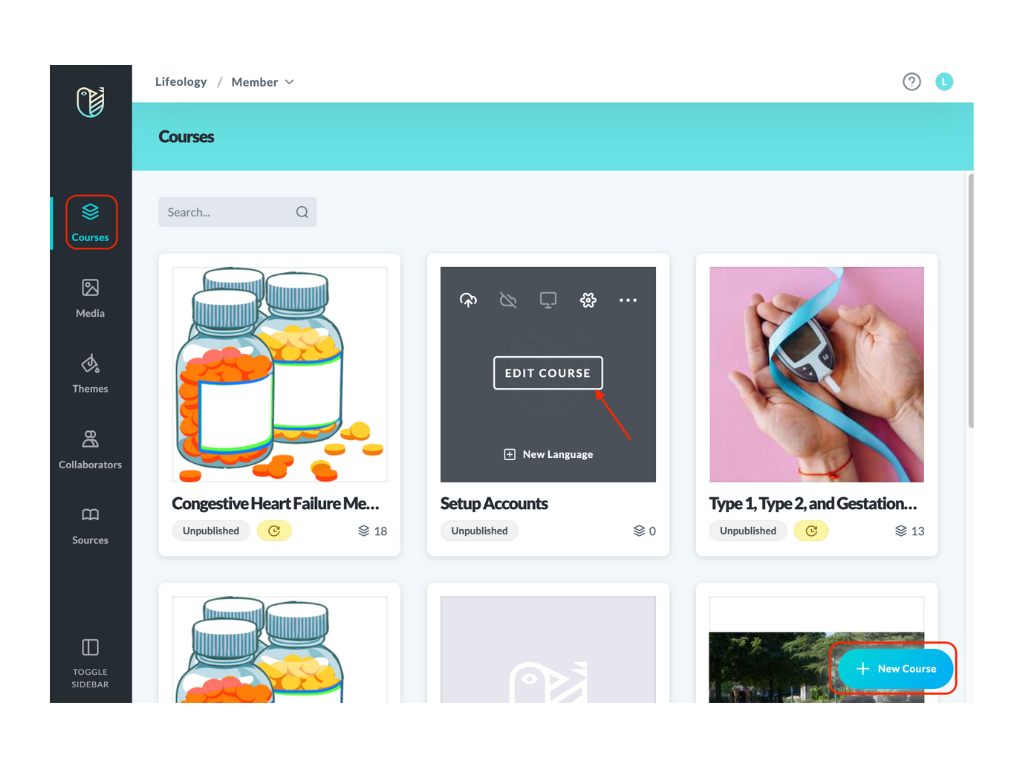
- From the Courses
 page (located in the sidebar), hover the cursor on the course tile you wish to add a new language until it darkens.
 - Click + New Language.
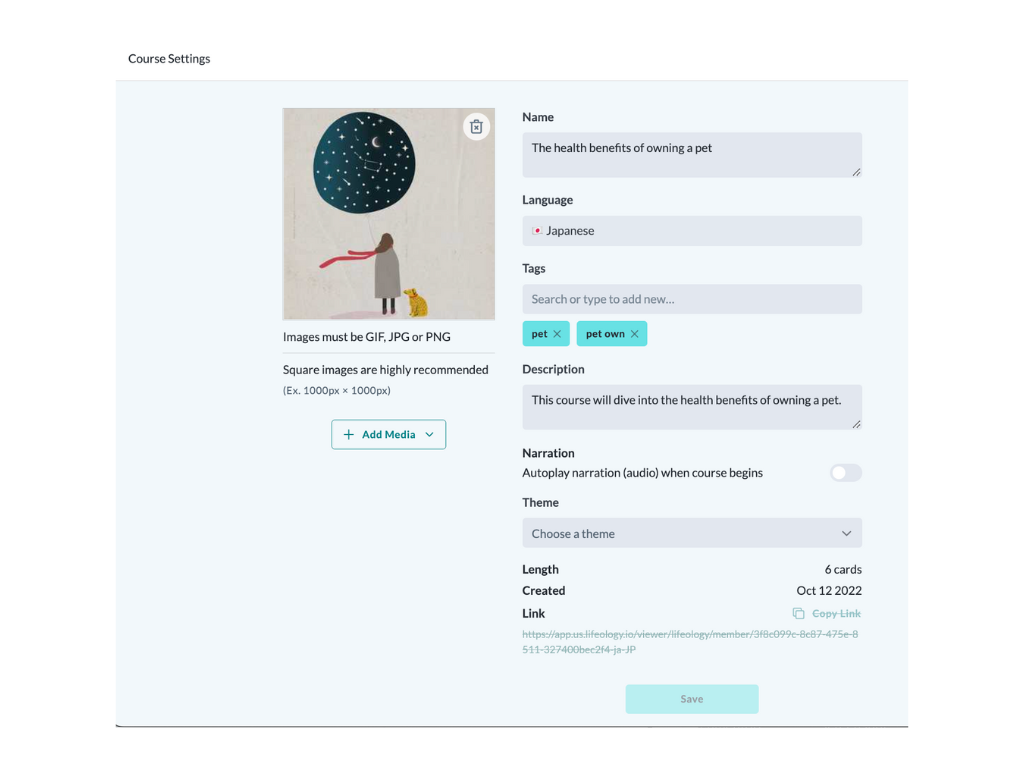
- In the window that opens, select the language to assign to the course from the dropdown and edit the text responses into the new language.
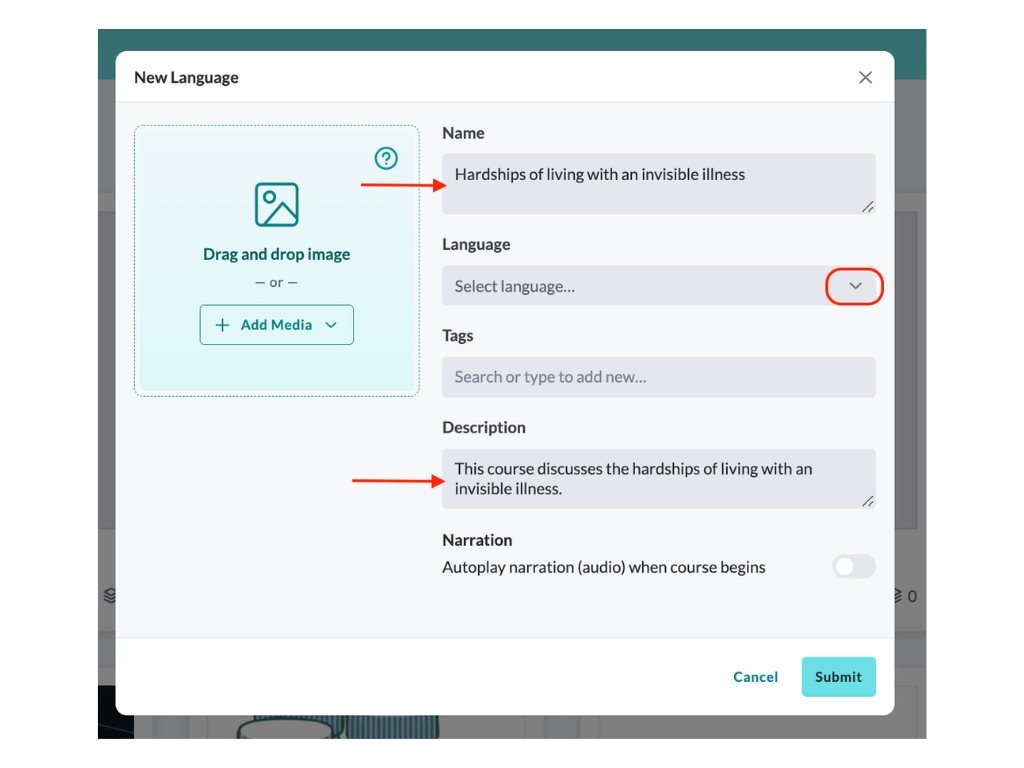
- Click Submit.
- To add more language versions, repeat steps 1-4.
- Add cards and adjust settings for your course for each language, remembering to click Save after each change.
- Click Publish.
Create a new Language Version using Duplicate As… and Translating
Duplicate As… is another way to create a new version of your course and assign a language. Duplicate As… clones the entire course, including the cards and media to simplify the process of creating a new language version. If nothing more is selected, the course copies over in the original language.
Builders can check the Translate All checkbox to have all course cards auto-translated to the selected language. Alternatively, each individual card can be translated independently.
To Duplicate and Translate a Course into a New Language Using Duplicate As… :
- Navigate to your course from the Courses page , hovering your cursor on a course tile, and clicking Edit Course.
- In the header, click the … and select
 Duplicate As… from the menu that opens.
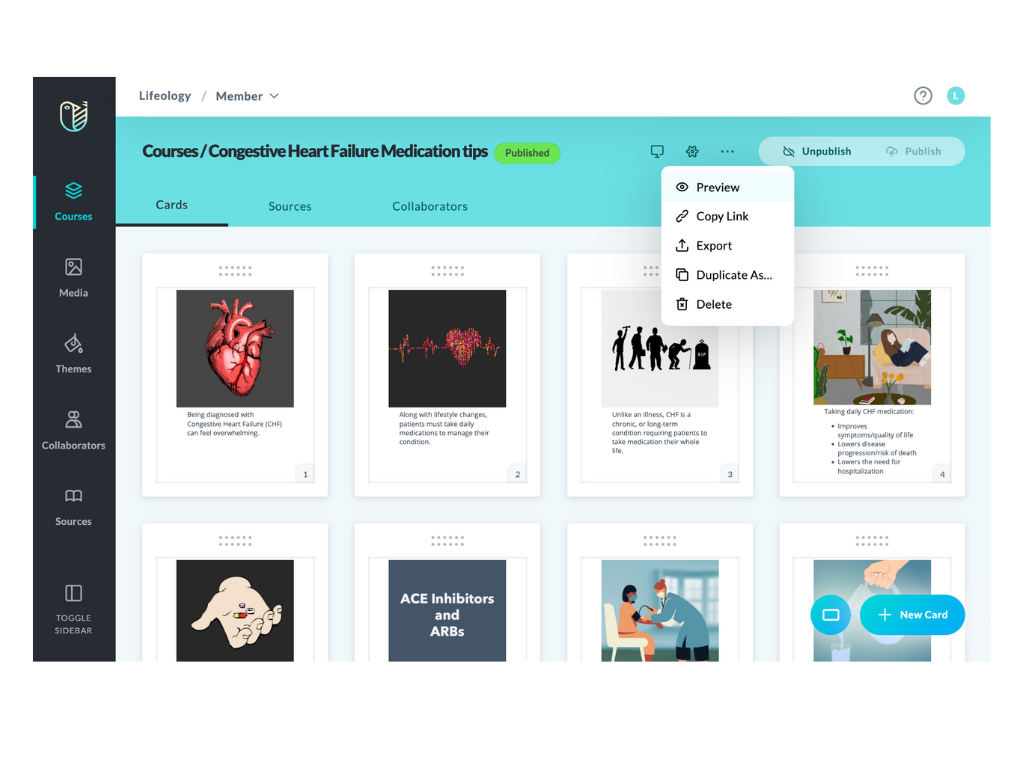
- Select the language for the new course from the dropdown. If you wish to auto-translate all of the text for your course cards to the new language, check the Translate All checkbox (optional).
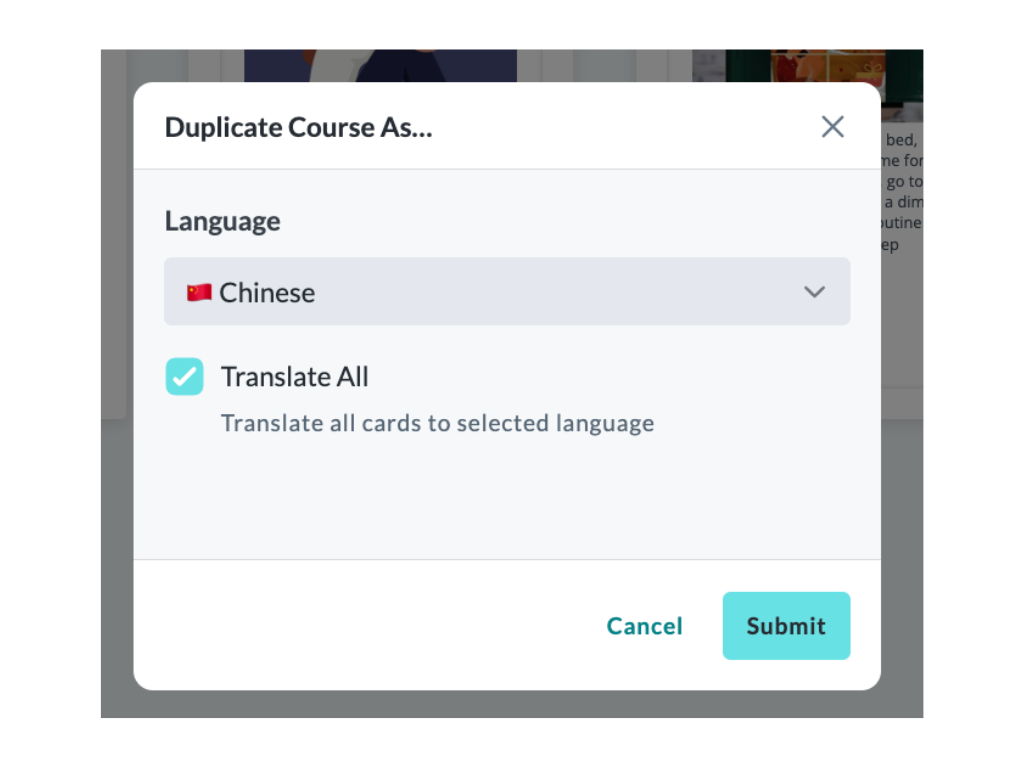
- Click Submit. The entire course copies over (and cards are translated if selected).
- You’ll be returned to the layout within the new language version where you can make further edits.
If you chose to translate all cards (in step three), update the rest of your course to the new language:- Translate the title, description, and tags by clicking the Course Settings icon
 .
.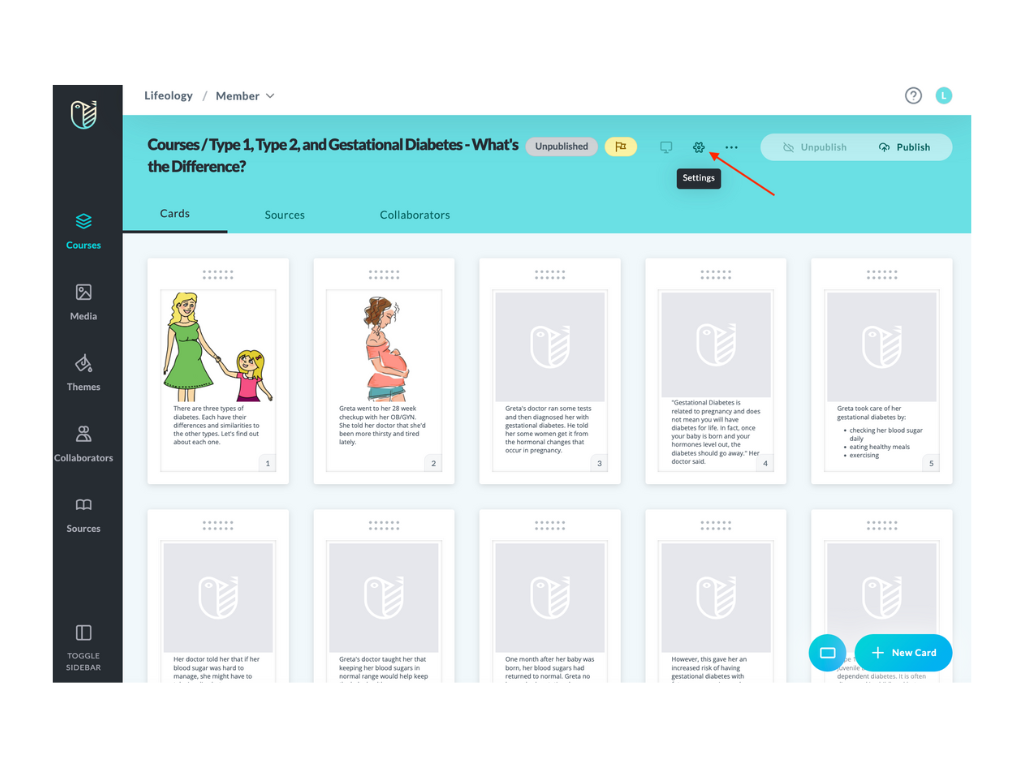
- Translate any text responses and tags on this page to the new language and remember to click Save after all changes.
- Translate the title, description, and tags by clicking the Course Settings icon
- To translate any cards individually (optional):
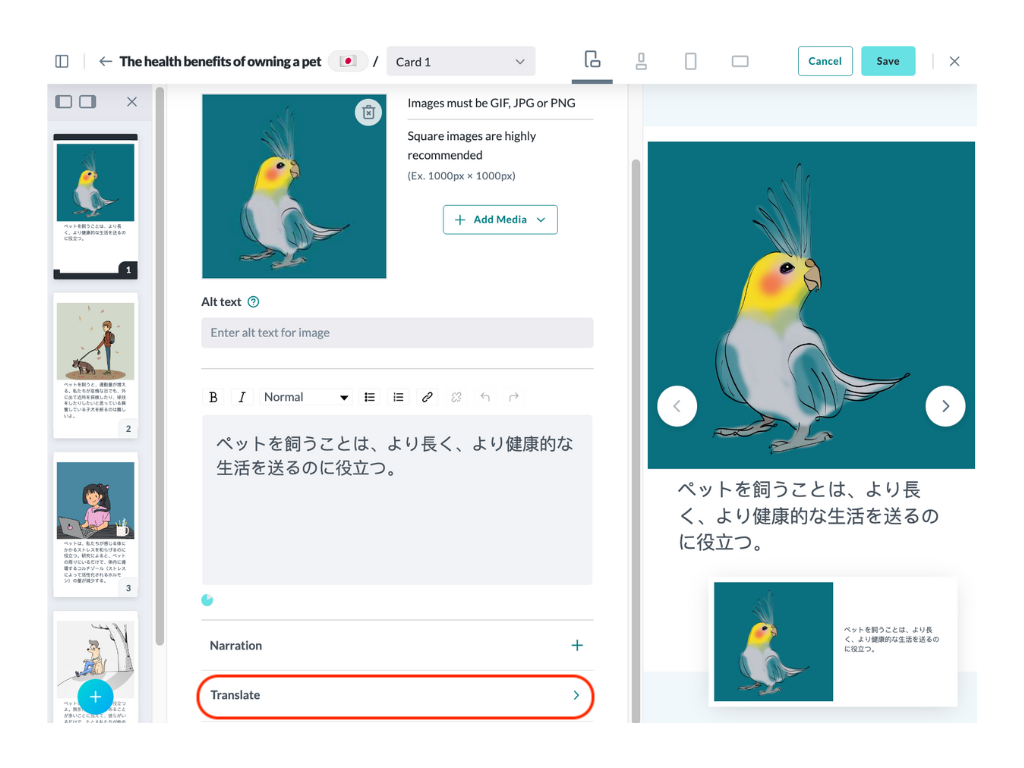
- Enter a card by hovering on it and clicking Edit Card.
- Click Translate >.
- Select the original language in the From language… dropdown, and the new language to translate the card to in the To Language… dropdown.
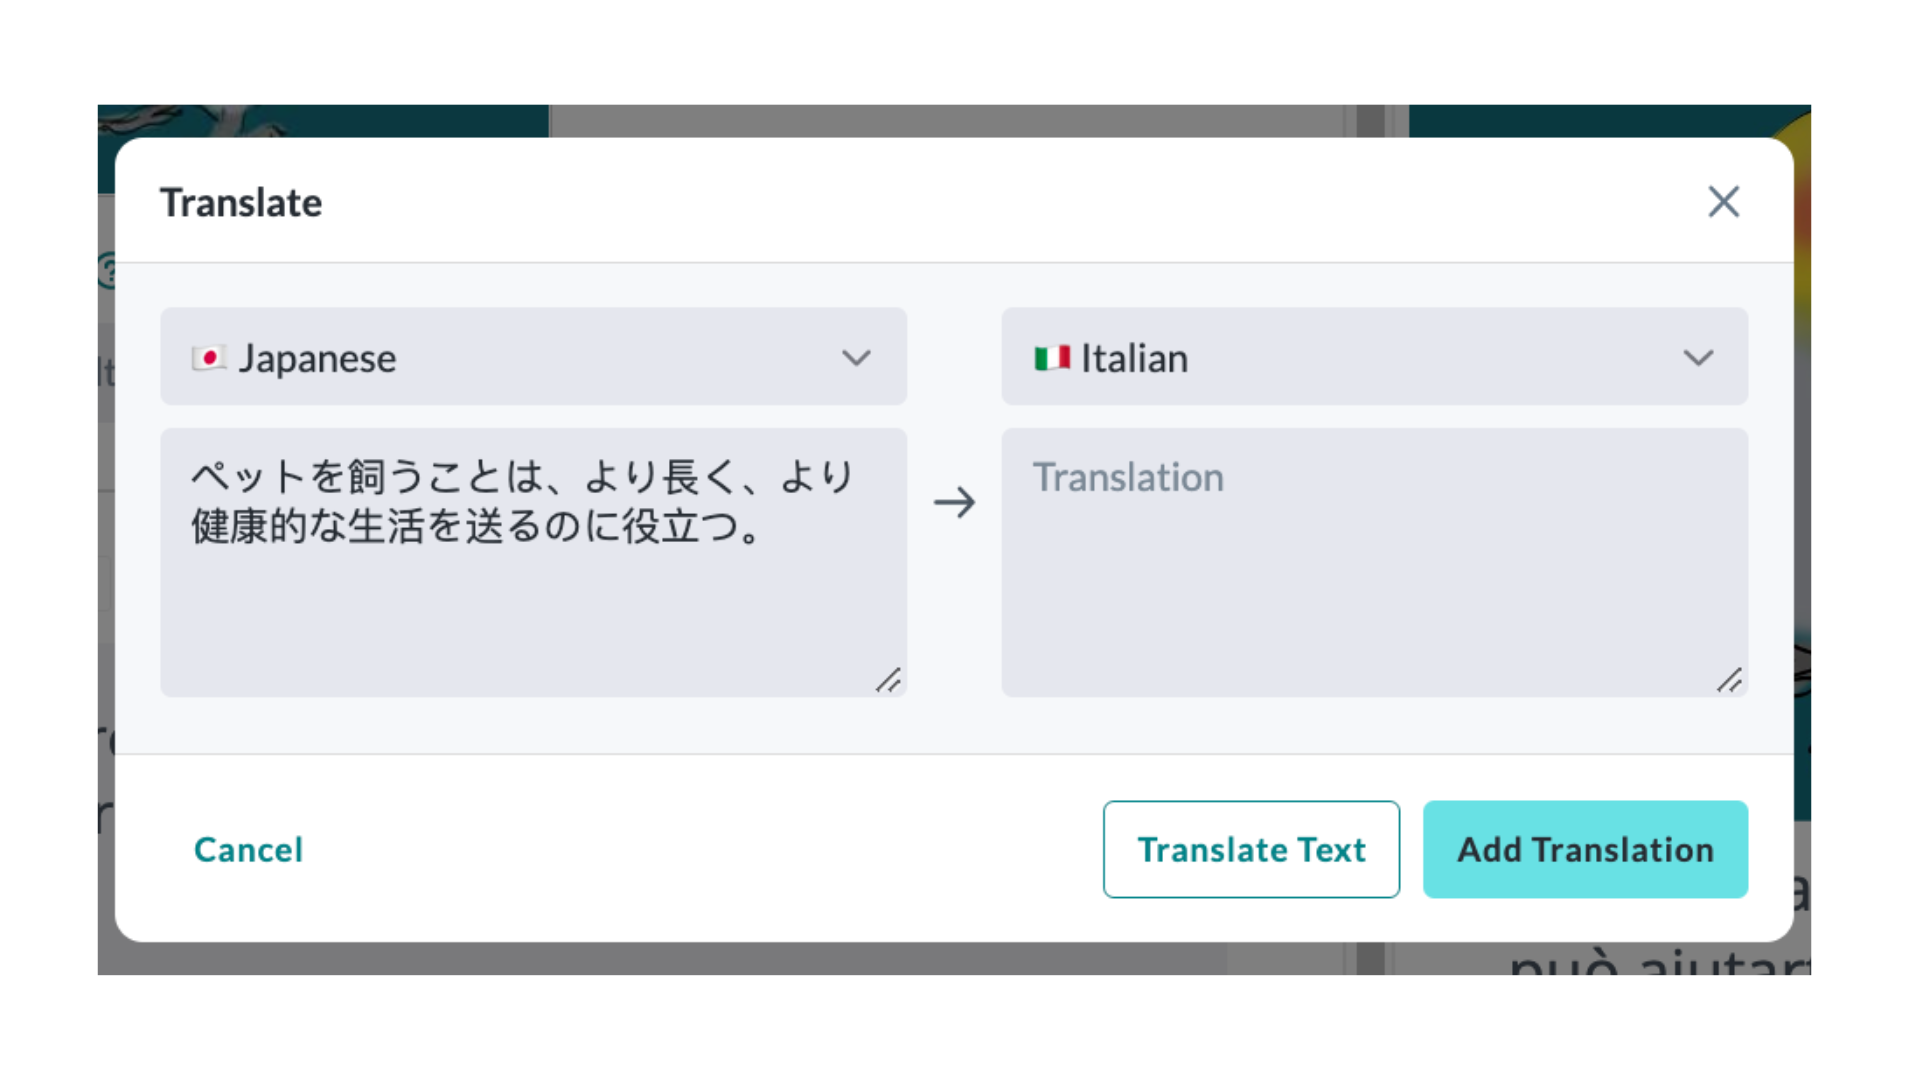
- Click Translate Text. The new translation displays. If everything is correct, click Add Translation.
- Click Save.
- Enter a card by hovering on it and clicking Edit Card.
- If you’ve translated this course to the new language, update any narration:
- Remove any old Narration that does not match the updated card text by clicking Delete
 .
.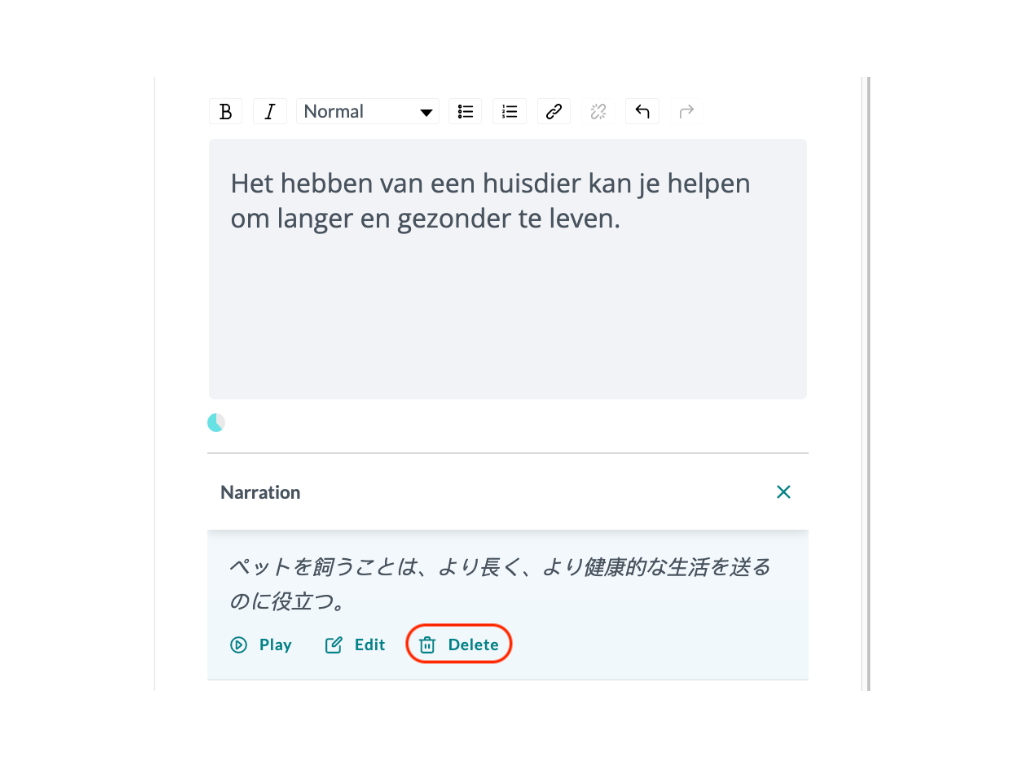
- When asked if you wish to delete the audio, click Delete to confirm.
- Add narration for the newly translated language by clicking Narration +.
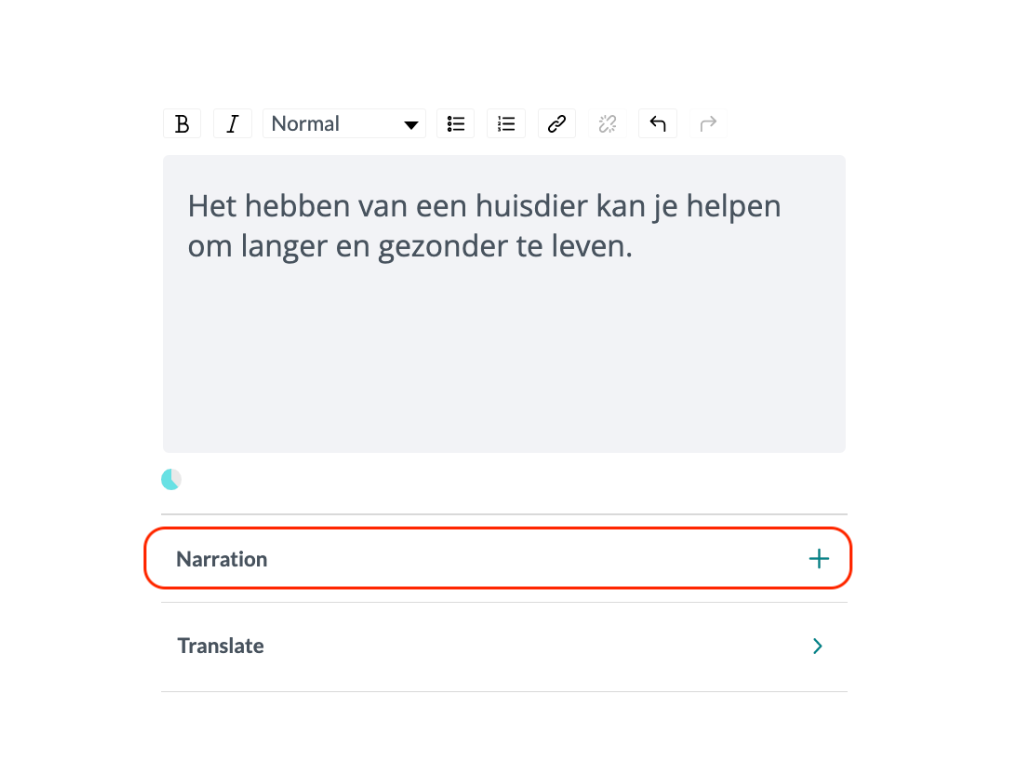
- Click + Add Narration Script.
- In the window that opens, select a voice from the dropdown and click Generate Audio.

- Play the preview. If it sounds good, click Add Narration.

- Click Save.
- Remove any old Narration that does not match the updated card text by clicking Delete
- When finished with your edits, click Publish.
Duplicate All
Duplicate All is a global operation, meaning it affects the entire stack of courses, literally making a copy of all language versions in a course stack. This feature is accessed from the Courses page ![]() , by hovering your cursor on a course tile until tools are presented. Then click … and select Duplicate All from the menu.
, by hovering your cursor on a course tile until tools are presented. Then click … and select Duplicate All from the menu.
To Access Duplicate All:
- Navigate to the Courses page
- Hover your cursor on a course tile until tools are presented
- Click … and select Duplicate All from the menu
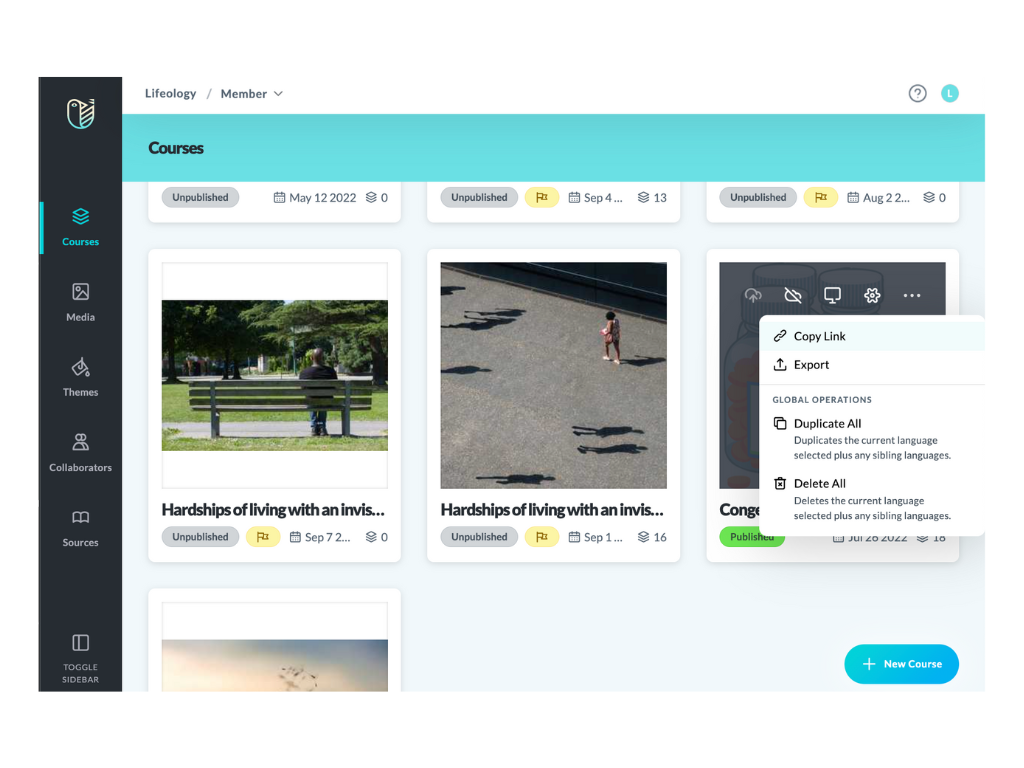
Duplicate All duplicates all language versions in a course stack. However, Duplicate As… (shown below) only duplicates the single language version you are in, not the entire course stack.

Delete All
Delete All ![]() is a global operation, meaning it deletes the entire course stack of all language versions for that course.
is a global operation, meaning it deletes the entire course stack of all language versions for that course.
To Access Delete All:
- Navigate to the Courses page
- Hover your cursor on a course tile until tools are presented
- Click … and select Delete All from the menu
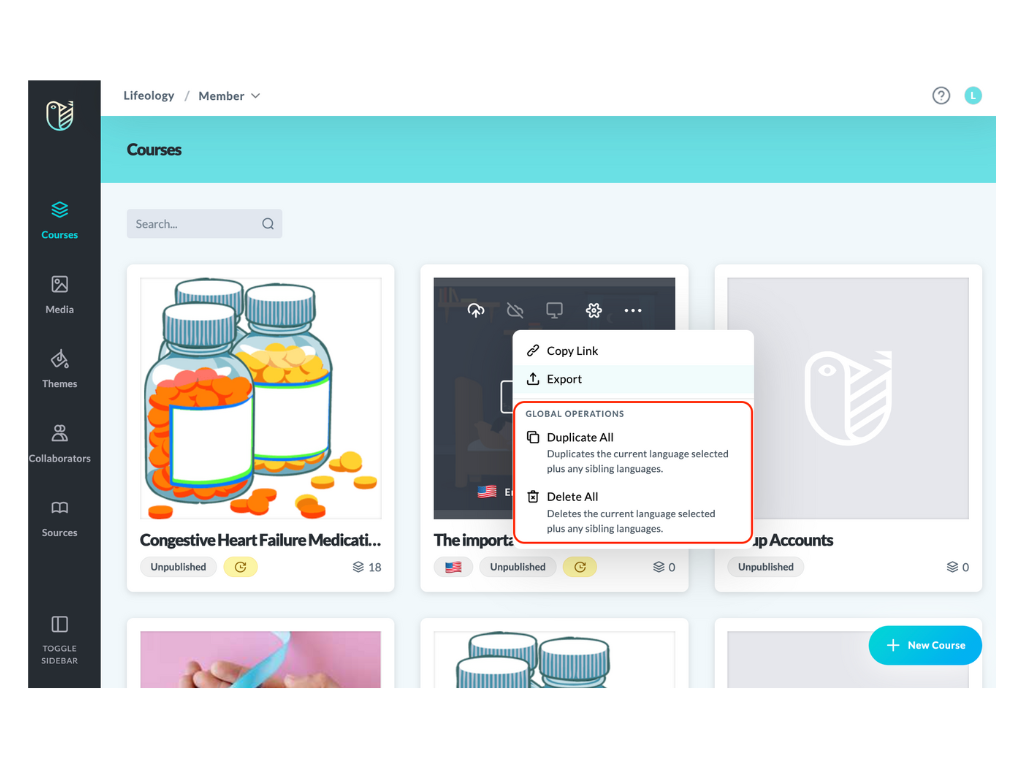
Note: The other tools in a course tile’s … menu (shown above) include Copy Link  and Export
  . These two tools apply only to the language version selected, not the whole course stack. Copy Link copies the course URL to the clipboard. Export downloads a zip folder with the course media and template.